For jaw-dropping views of Mount Rainier Nationwide Park, it’s arduous to beat the Skyline Path Loop.
Your complete hike is a magnificence. Beginning in Paradise, you’ll hike previous beautiful Myrtle Falls, via pine forests, after which ascend the slopes to the bottom of Mount Rainier. From Panorama Level, get pleasure from spectacular views over the park, and on a transparent day you possibly can see so far as Mount Hood in Oregon. Then it’s a steep descent again to the Paradise Customer Heart.
That is an important hike in Mount Rainier Nationwide Park and it’s one among our favorites. With everchanging views and an opportunity to stand up near Mount Rainier, this hike is an unforgettable expertise.
Information In regards to the Hike
Distance: 6.2 miles
Problem: Strenuous
Complete Elevation Acquire: 1,900 toes
Beginning Elevation: 5,460 toes
Highest Elevation: 7,020 toes
Size of Time: 3 to five hours
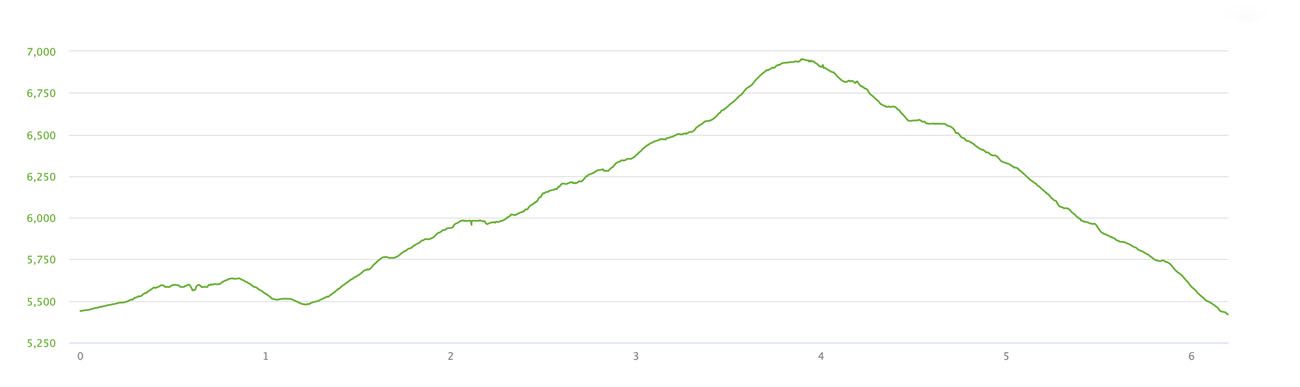
Elevation profile of the hike doing the loop in a counter-clockwise route.
Please follow the seven rules of Depart No Hint: plan forward, keep on the path, pack out what you deliver to the mountaineering path, correctly get rid of waste, go away areas as you discovered them, reduce campfire impacts, be thoughtful of different hikers, and don’t strategy or feed wildlife.
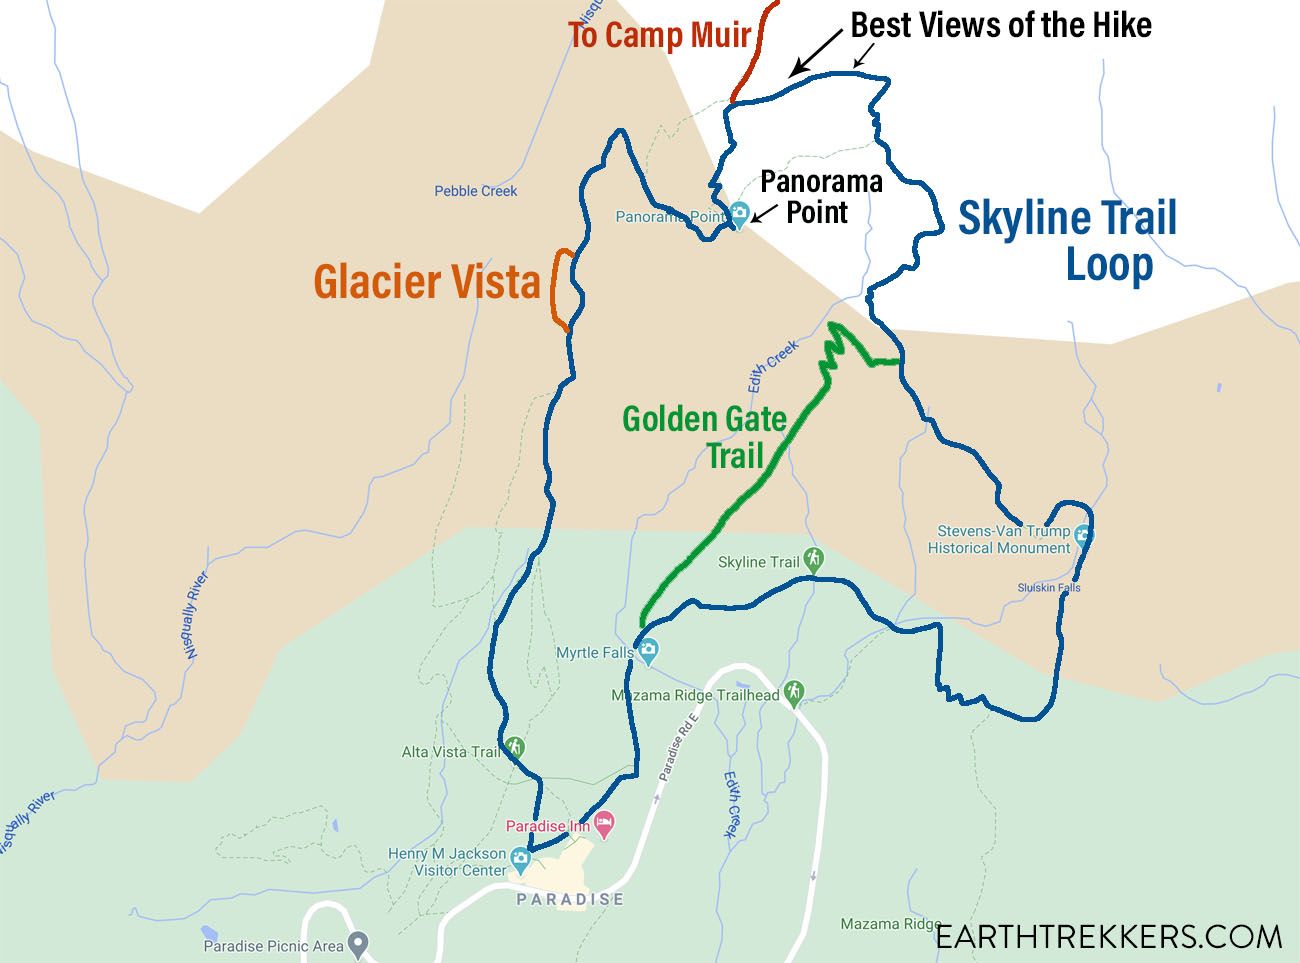
Clockwise or Counter-Clockwise?
For the reason that Skyline Path is a loop, it may be completed in both route. We hiked it each instructions and based mostly on our expertise, it’s equally superior each methods.
There are benefits and drawbacks to every route.
When you hike the Skyline Path in a clockwise route, you should have a brief, steep climb as much as Panorama Level (so that you get a majority of the uphill work over with early within the hike). For this whole part of the hike, Mt. Rainier can be smack in entrance of you, so although it’s a powerful climb, you get a tremendous view for the primary third of the hike. When you attain Pebble Creek Path (the path that continues as much as Camp Muir), it’s a regular downhill stroll and Mt. Rainier can be behind you, so you’ll have to hold turning round to see it.
When you hike the Skyline Path in a counter-clockwise route, it’s an extended however extra gradual climb as much as Pebble Creek Path and Panorama Level. For a lot of the hike, Mt. Rainier is true in entrance of you. When you begin the downhill stroll again to Paradise, Mt. Rainier can be behind you.
If you wish to get the arduous, uphill stroll over with rapidly, hike the loop in a clockwise route. If you wish to benefit from the view of Mt. Rainier for an extended time period, hike it counter-clockwise.
When you begin this hike early within the morning, I like to recommend mountaineering the loop in a counter-clockwise route, so the solar is at your again for a lot of the hike.
However actually, you possibly can’t go mistaken with which route you select.
Mountaineering the Skyline Path Loop
This path description is for the counter-clockwise route.
Attending to the Trailhead
The path begins and ends in Paradise close to the Customer Heart. There’s a massive car parking zone however it does fill early, particularly on the weekends. Lower than 1 / 4 mile away is a second, massive, overflow car parking zone. By late morning, each of those tons can fill to capability, so it’s finest get right here early (no later than 9 am is what I might suggest throughout peak season) to make sure you get a parking house.
The path begins between the customer middle and the Paradise ranger station. Search for the paved path and a path signal indicating that you’re on the Skyline Path.
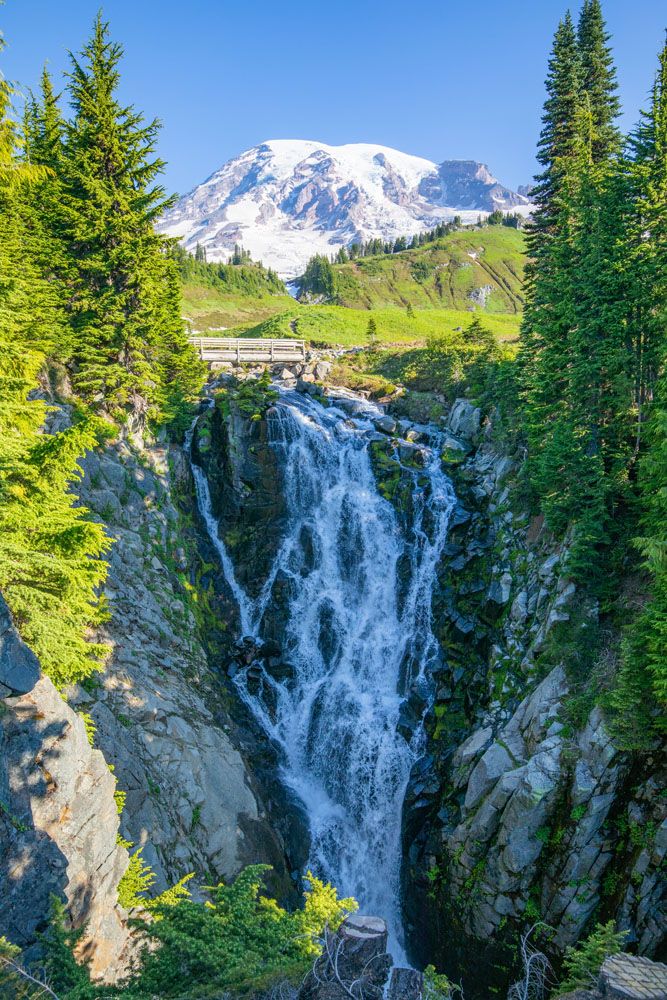
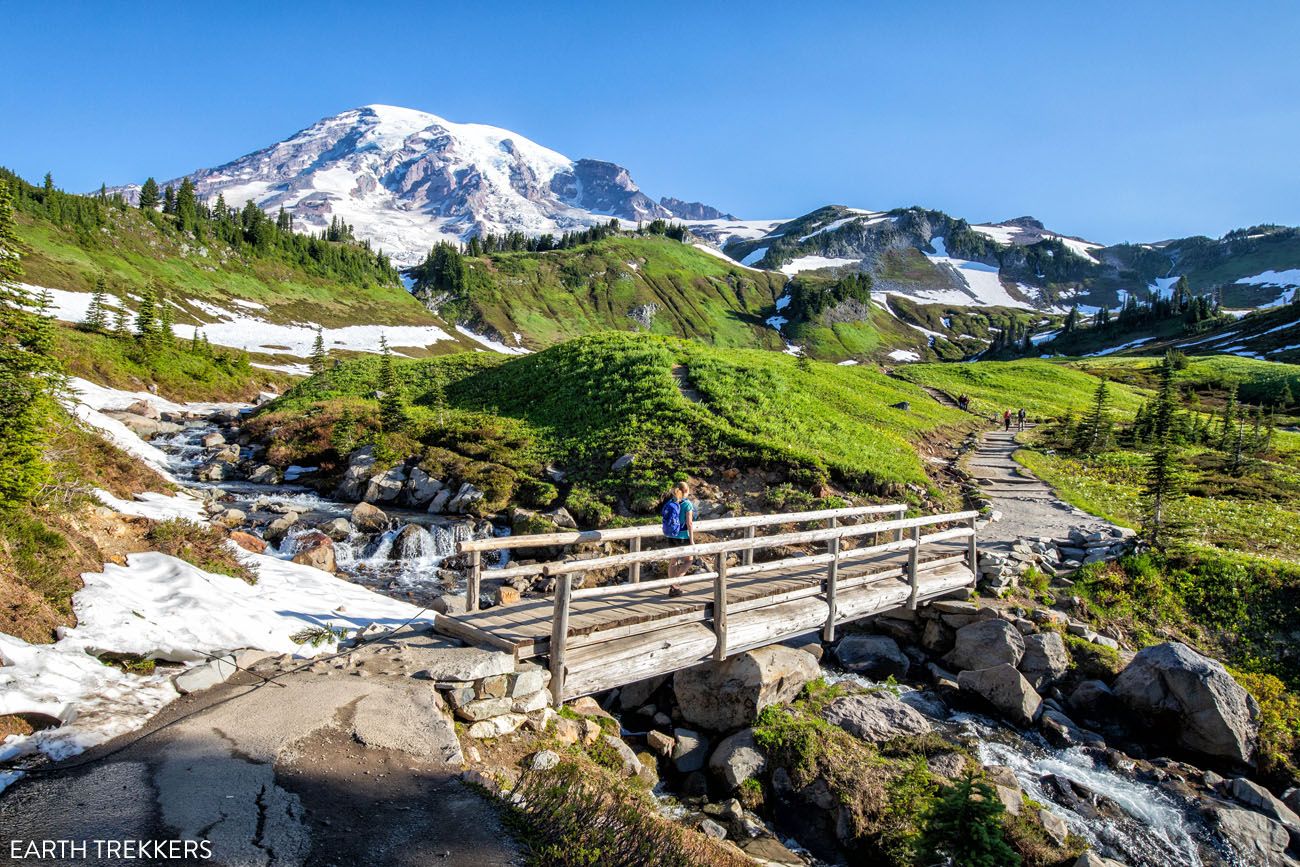
Myrtle Falls
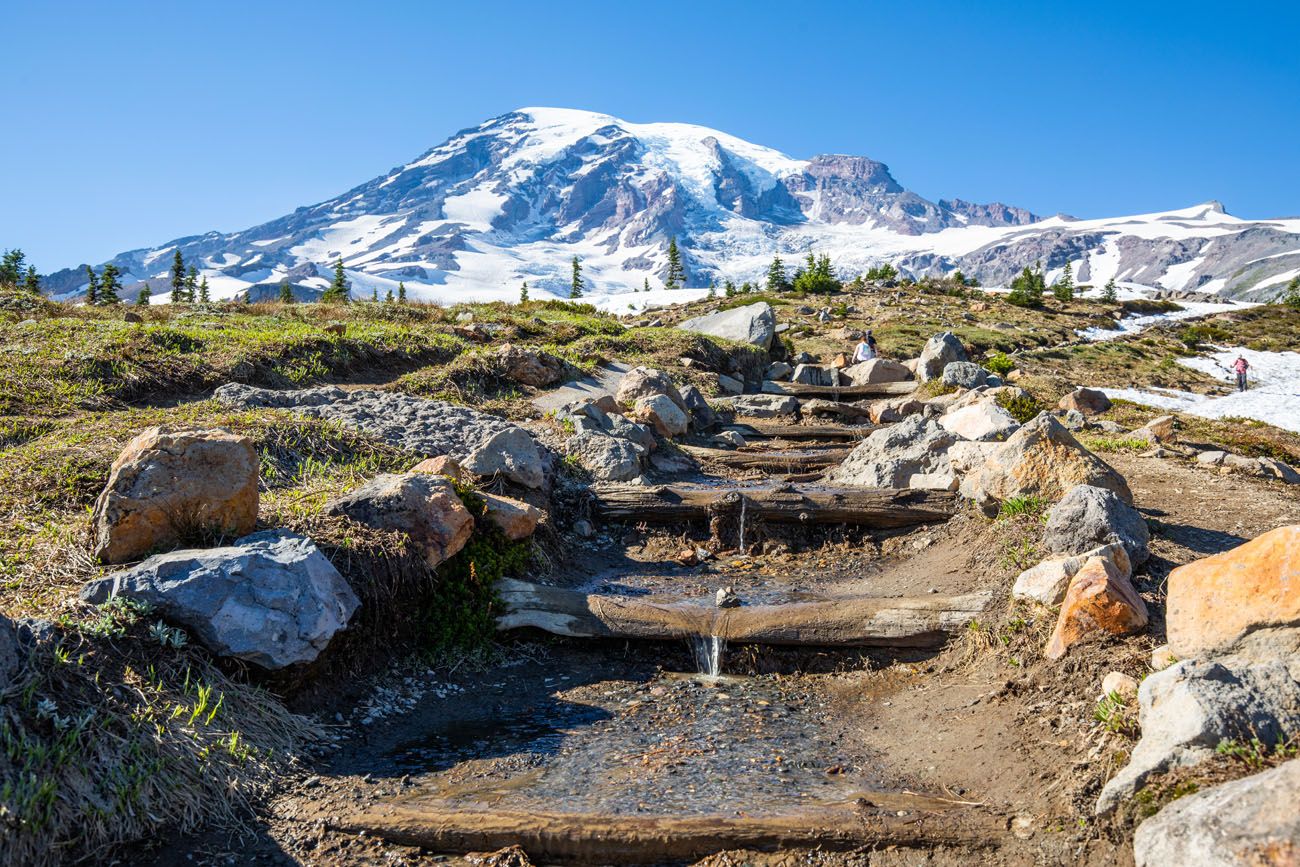
The primary a part of the hike is on a paved path. A half of a mile into the hike you attain Myrtle Falls. Take the staircase right down to the perspective and benefit from the attractive view of the waterfall with Mt. Rainier within the background.
Mountaineering to Panorama Level
Simply past Myrtle Falls the paved path is changed with a dust path. On the fork within the path, keep to the proper to proceed on the Skyline Path. When you take the path to the left (the Golden Gate Path), it’s a brief reduce. It takes off an enormous chunk of the Skyline Path however it’s a powerful climb as much as rejoin the Skyline Path.
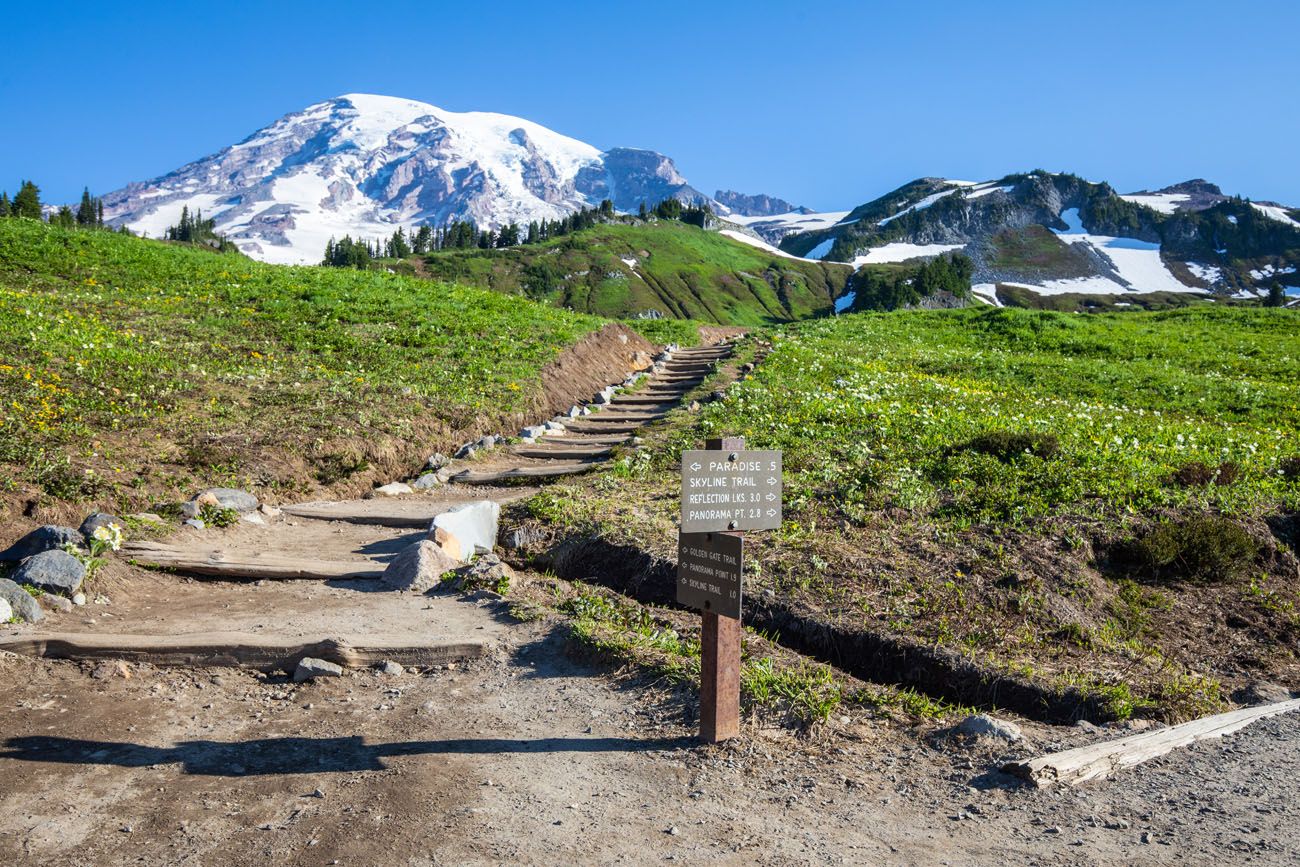
The Golden Gate Path heads immediately in direction of Mt. Rainier. It’s shorter however a lot steeper than staying on the Skyline Path, which continues to the proper.
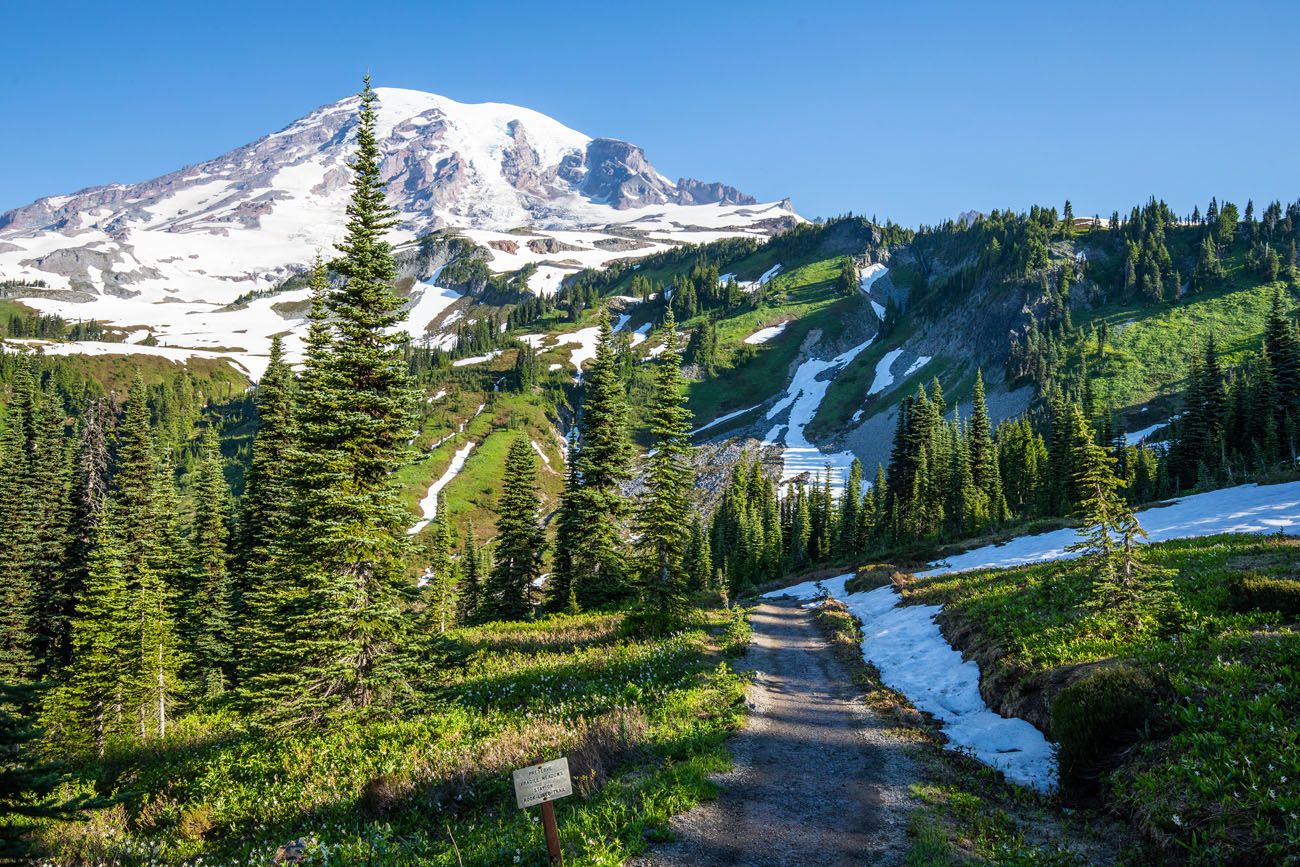
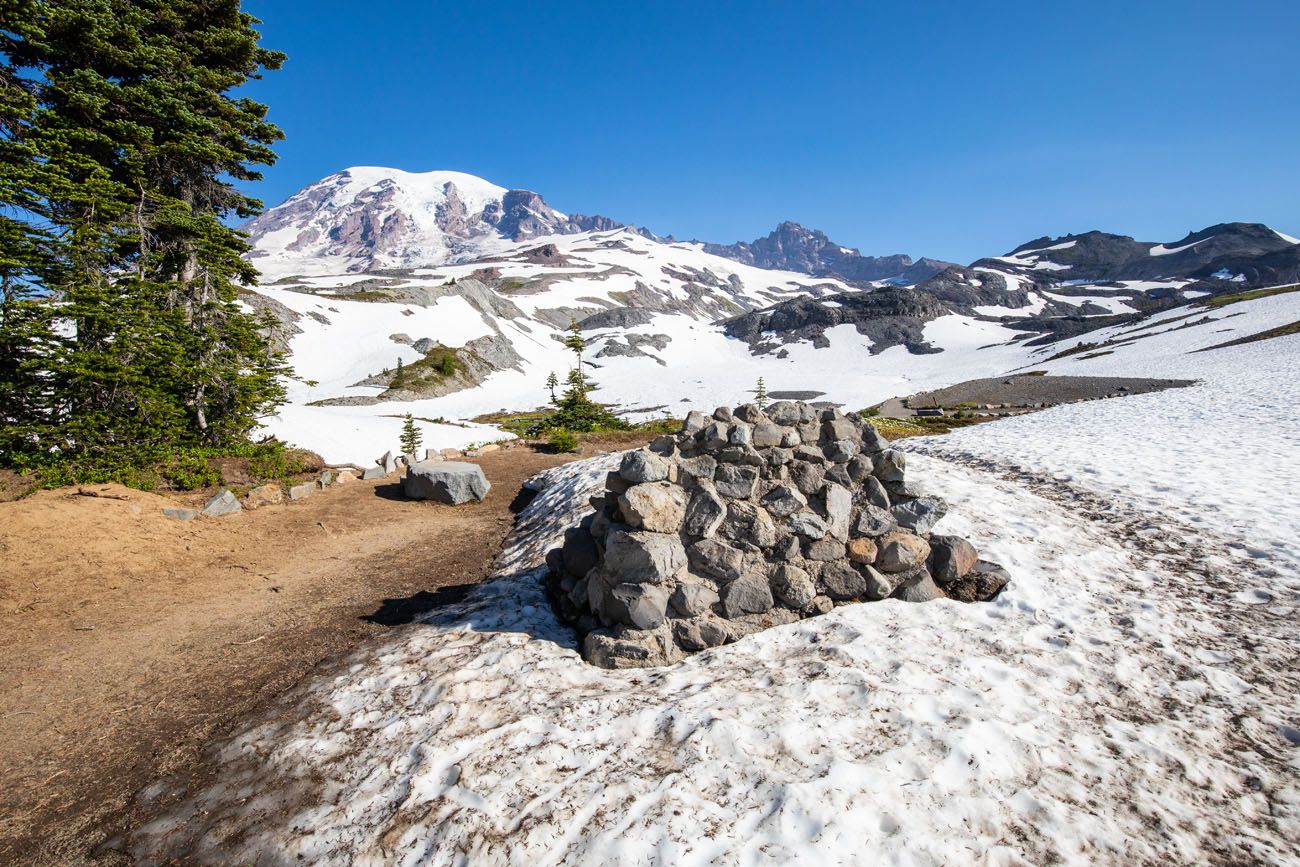
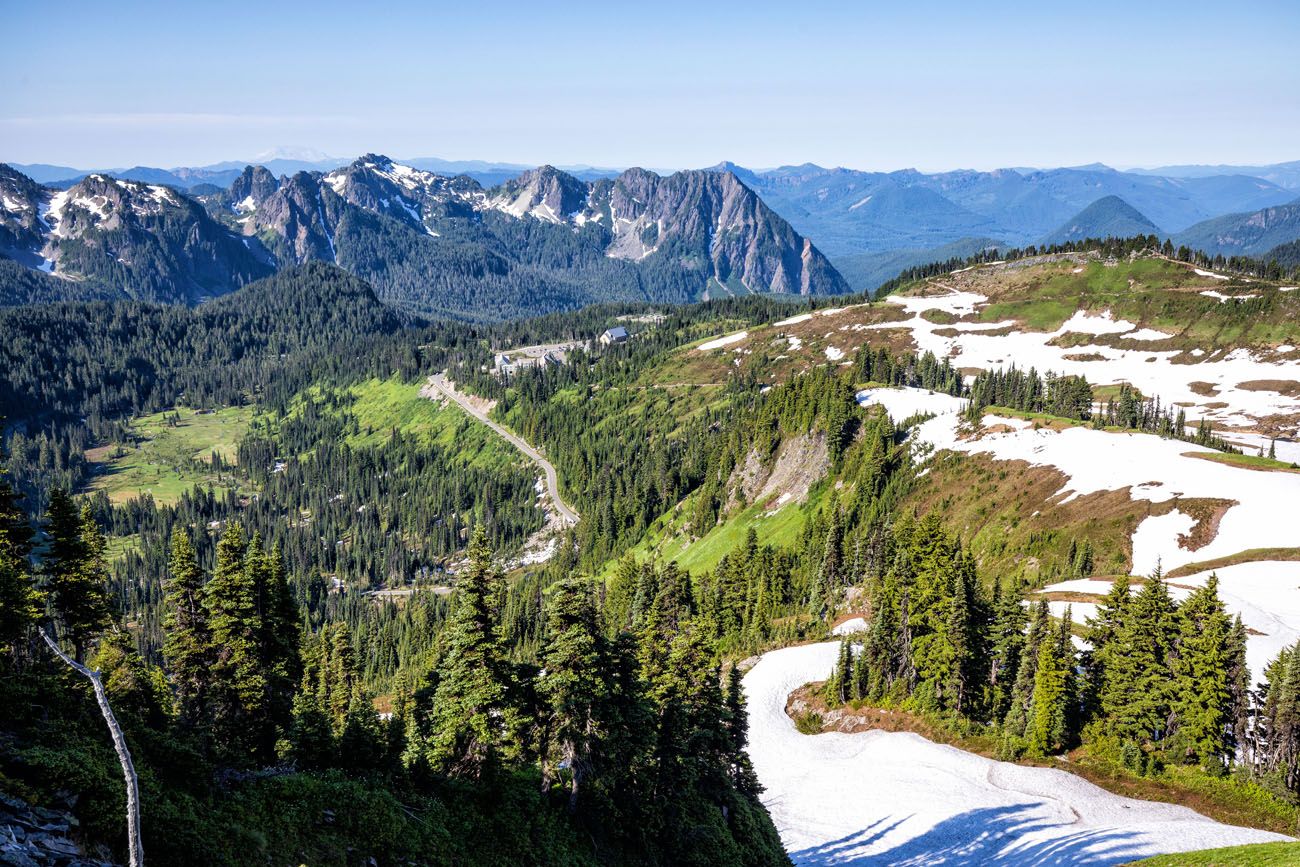
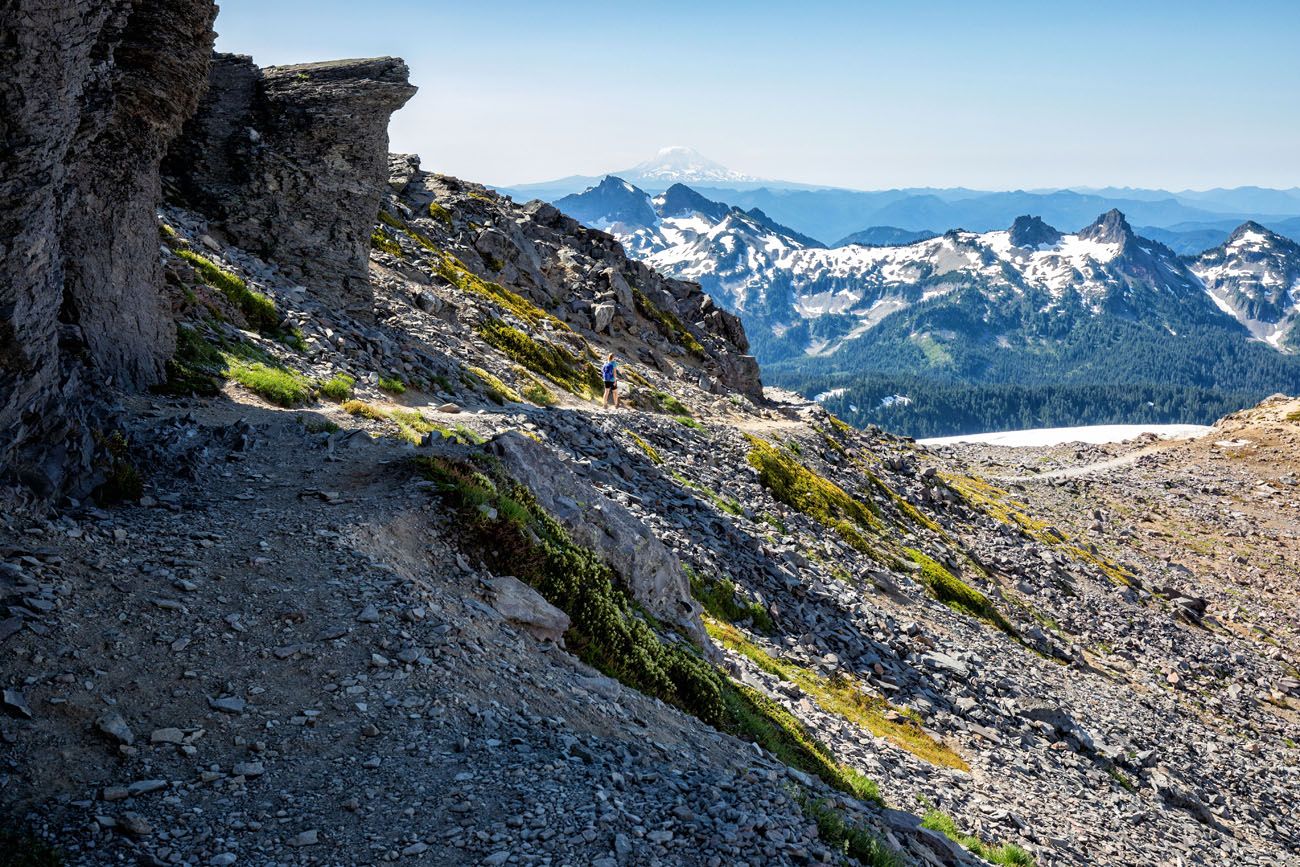
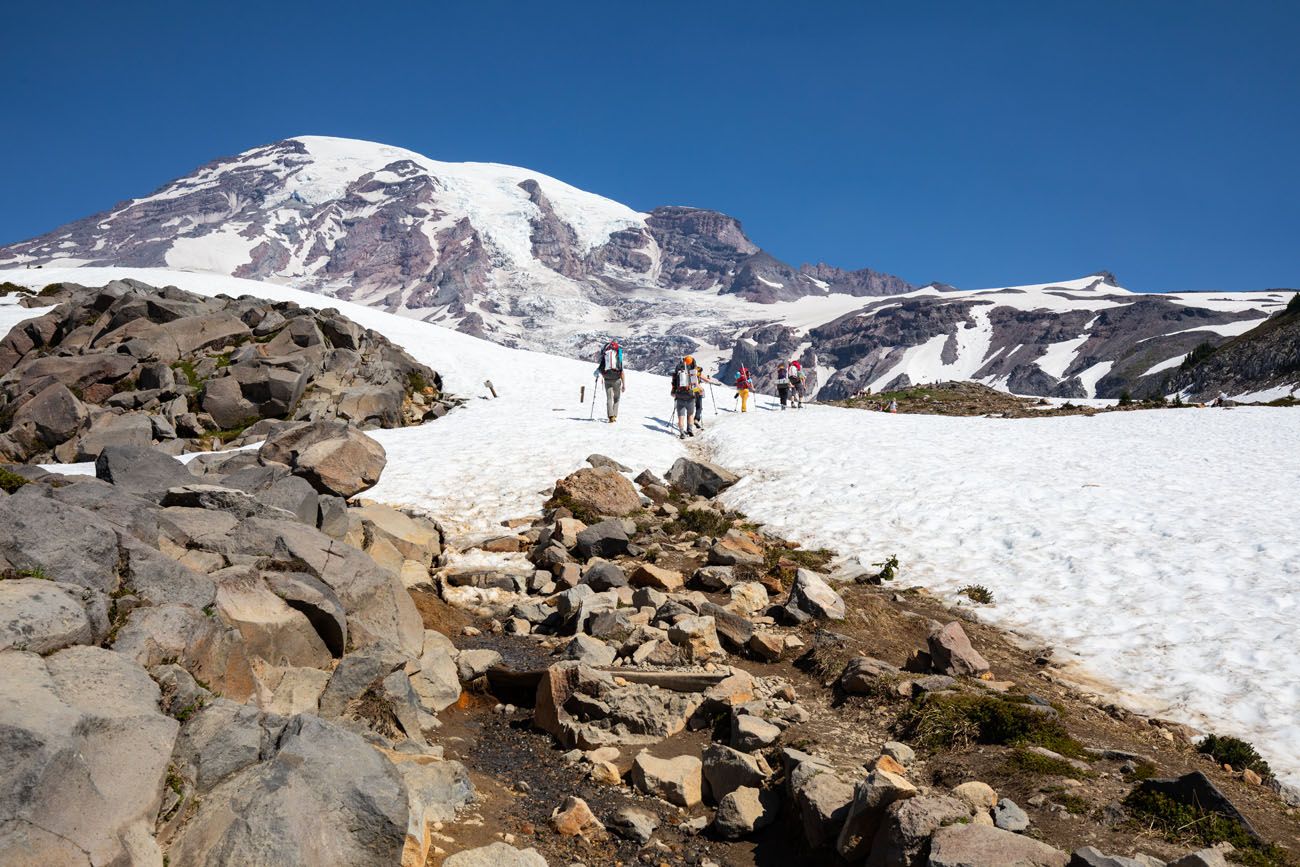
After a short downhill stroll, you’ll cross a number of small creeks after which the climbing begins. You climb up out of the forest after which hike alongside a ridgeline. To your left is Mt. Rainier and to your proper are snow-covered mountain ranges and Mt. Adams off within the distance. Even in the summertime, you will have to hike via snow.
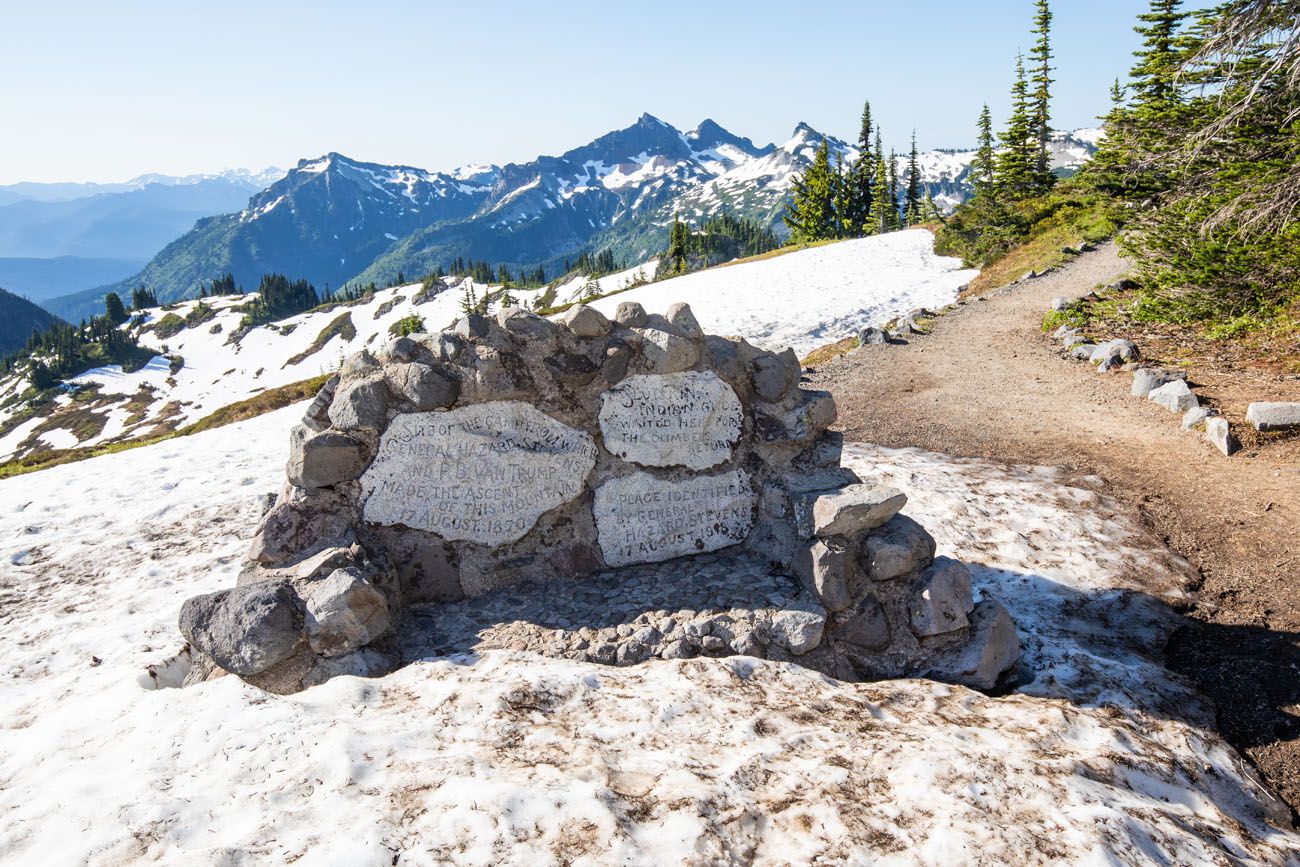
Finally, you’ll arrive on the Stevens-Van Trump Monument, which commemorates the placement of the campground from the place Hazard Stevens and PB Van Trump made the primary ascent of Mt. Rainier on August 17, 1870.
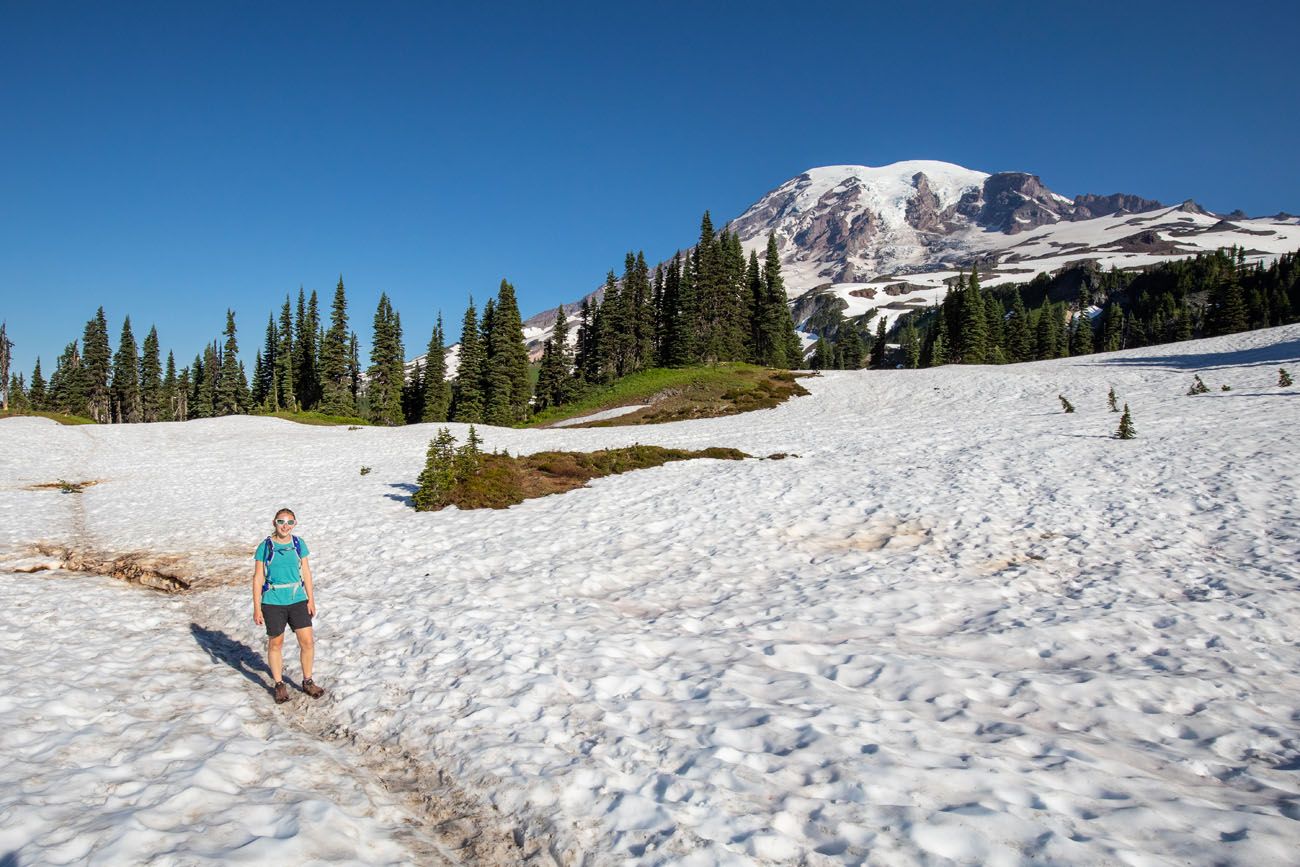
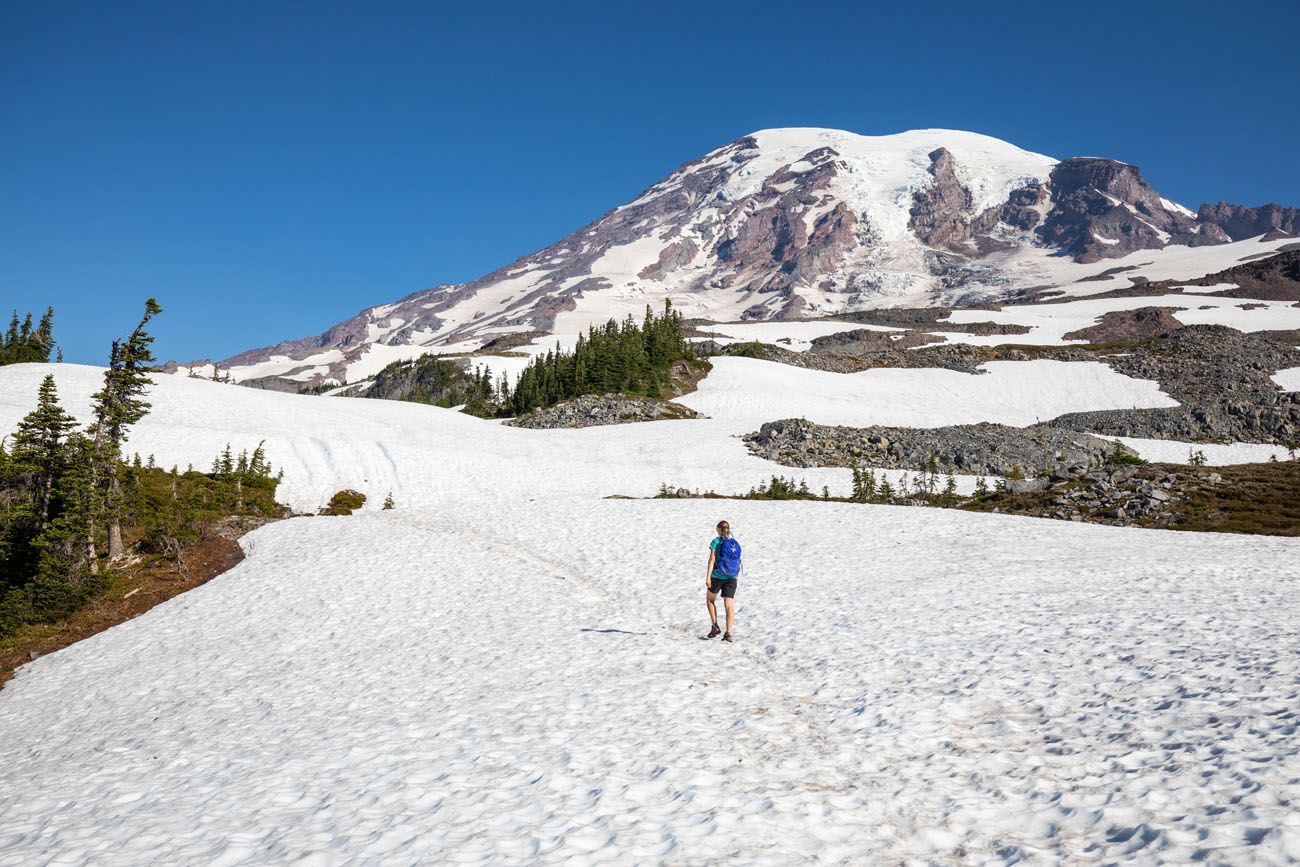
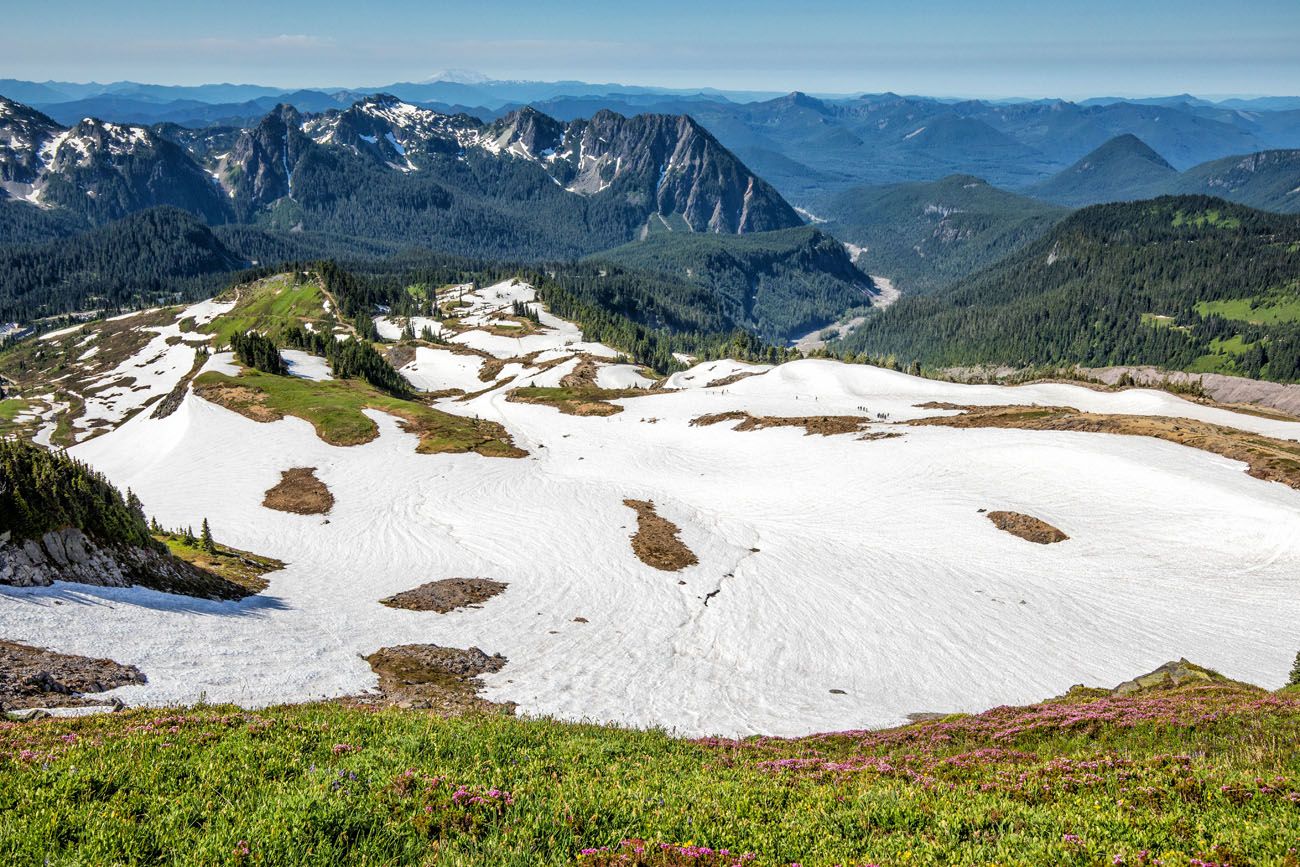
Once we did this hike in mid-July, there was nonetheless numerous snow on the bottom. From the memorial virtually to the very best level of the path, we hiked throughout big patches of snow. That is slippery, tiring, and might sluggish you down.
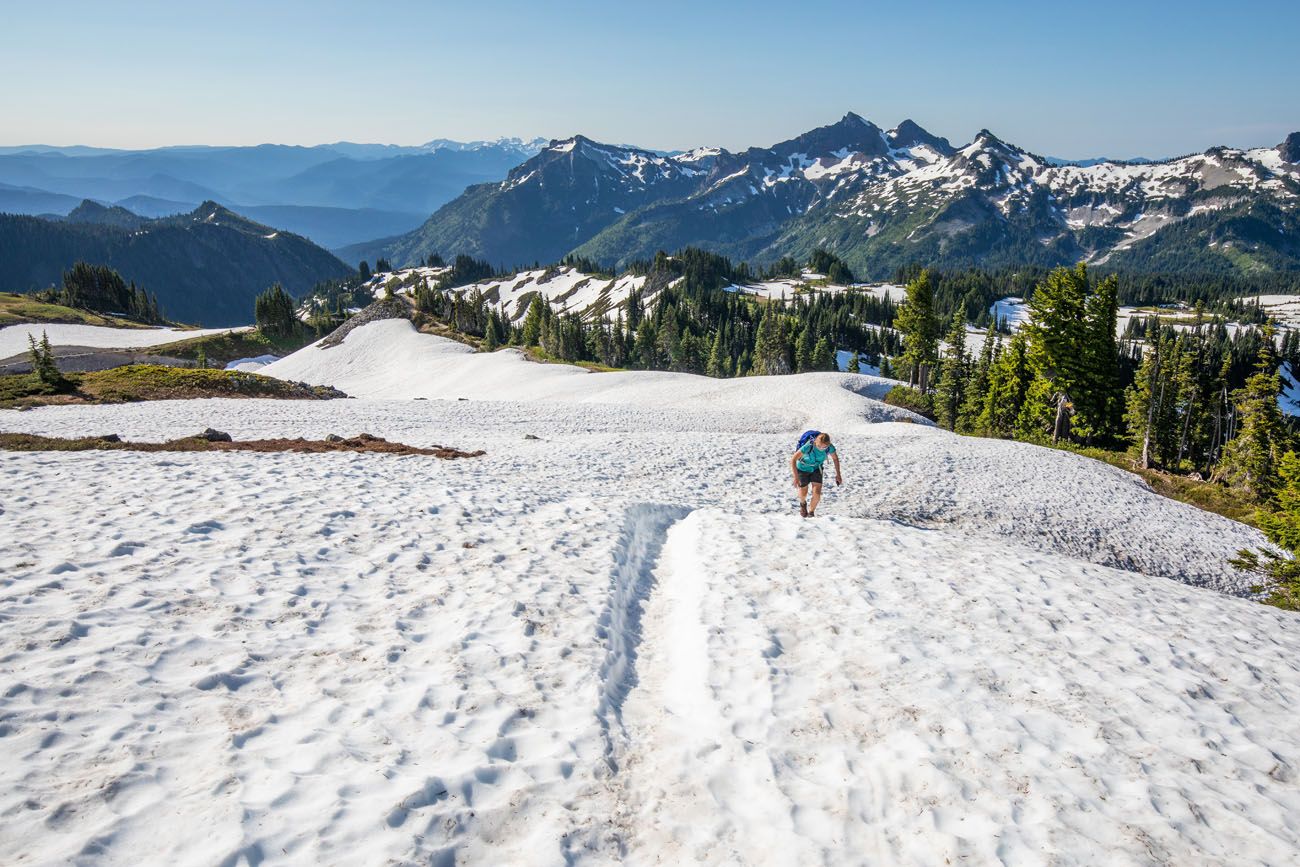
It’s also very simple to lose the path right here. In some locations, some small flags had been positioned alongside the path, however these may be very troublesome to identify. To maintain shifting in the proper route, we used Google Maps and mountaineering maps on our Garmin Fenix 5 watches. Happily, mobile service is sort of good within the Paradise space of the park and we had a number of bars of LTE for the whole hike.
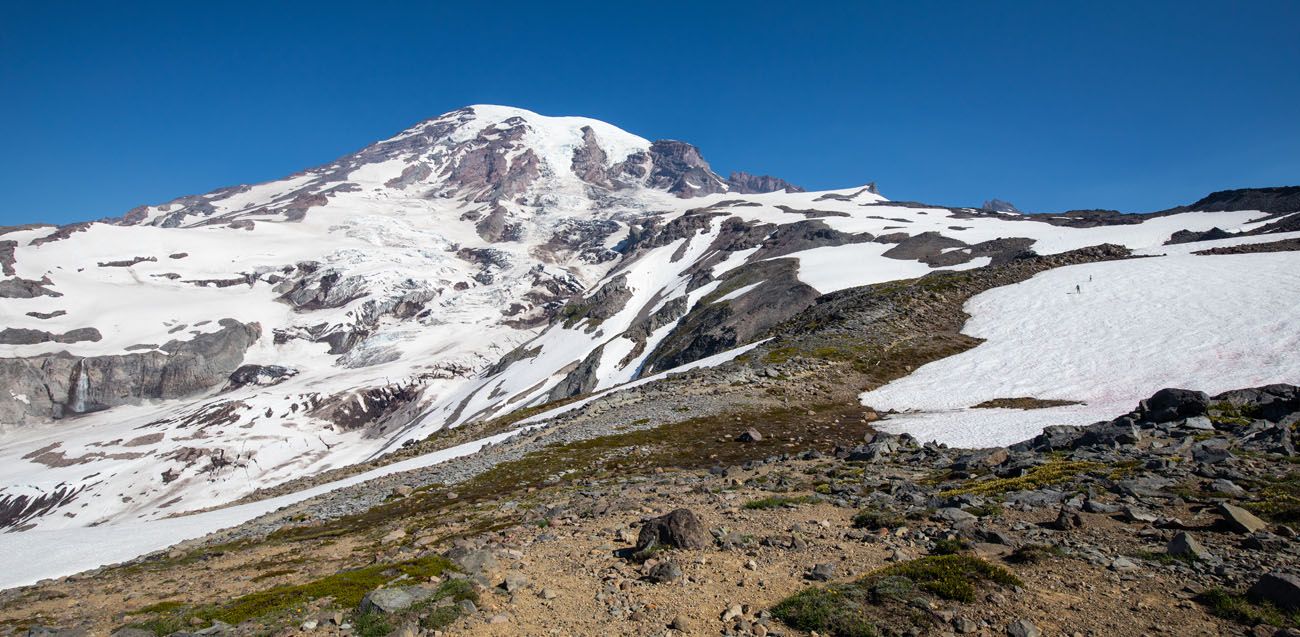
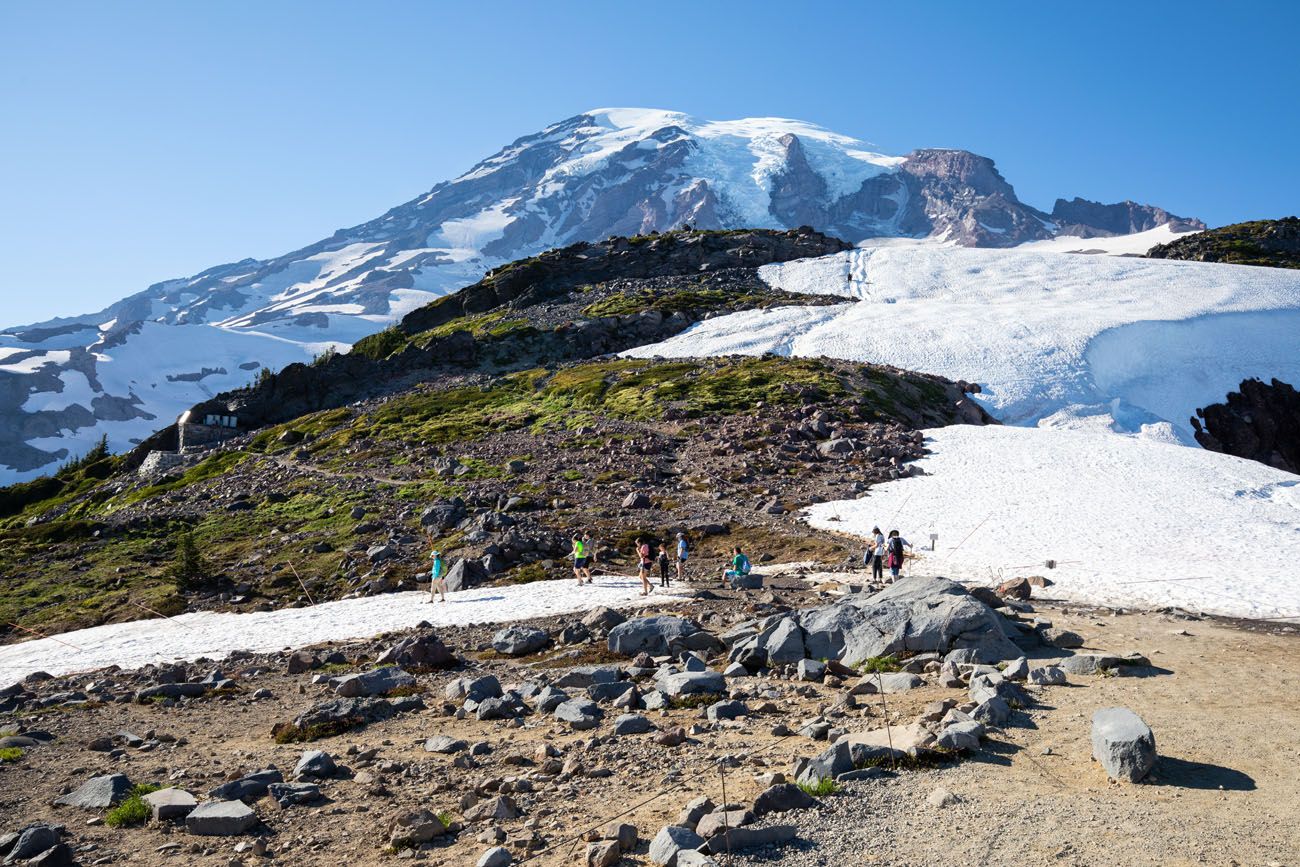
Previous a lot of the snow fields, the Golden Gate Path rejoins the Skyline Path. As you hike increased, the vegetation disappears and the bottom will get to be extra rocky and rugged. It’s a tiring hike as much as Panorama Level, however the views over the park from the path listed here are astounding.
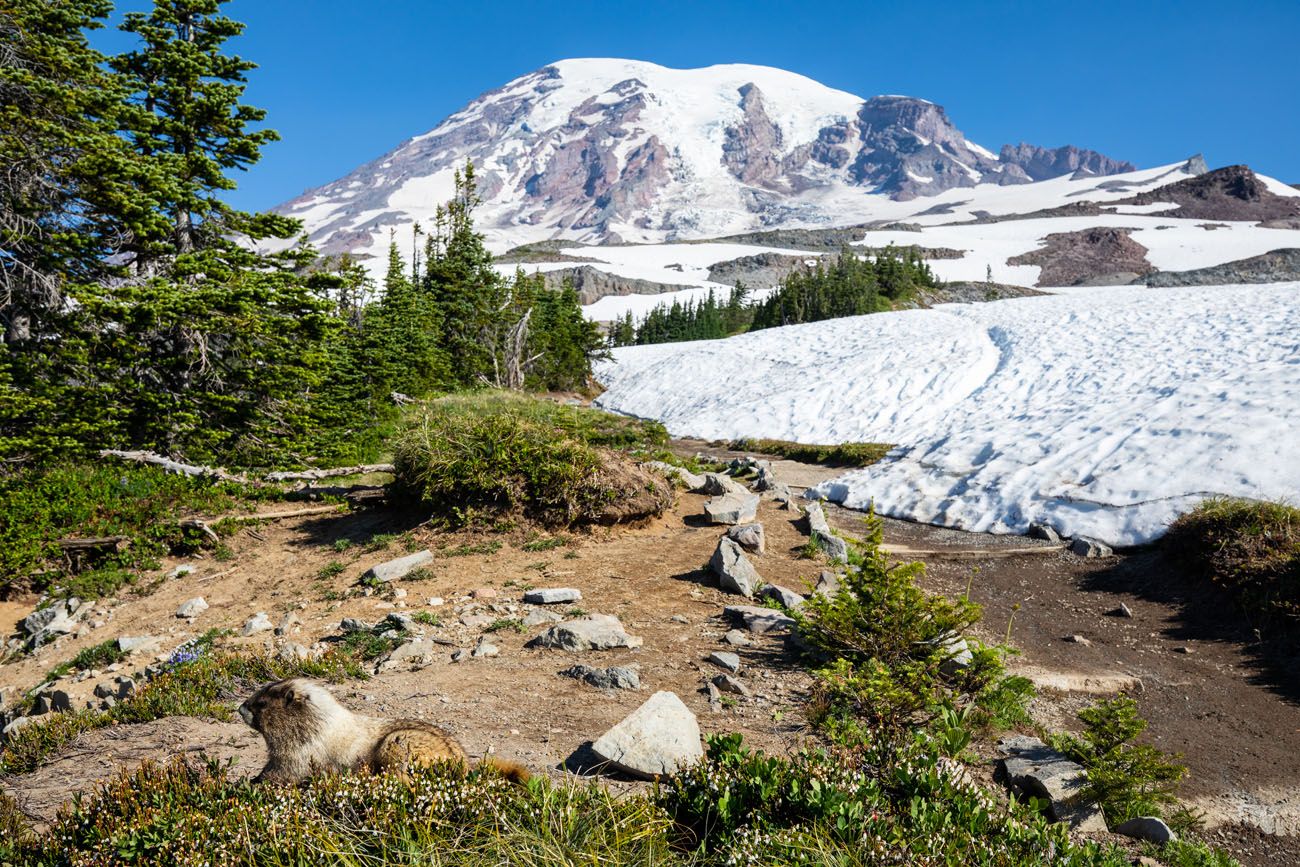
Hold a watch for marmots and mountain goats on the path.
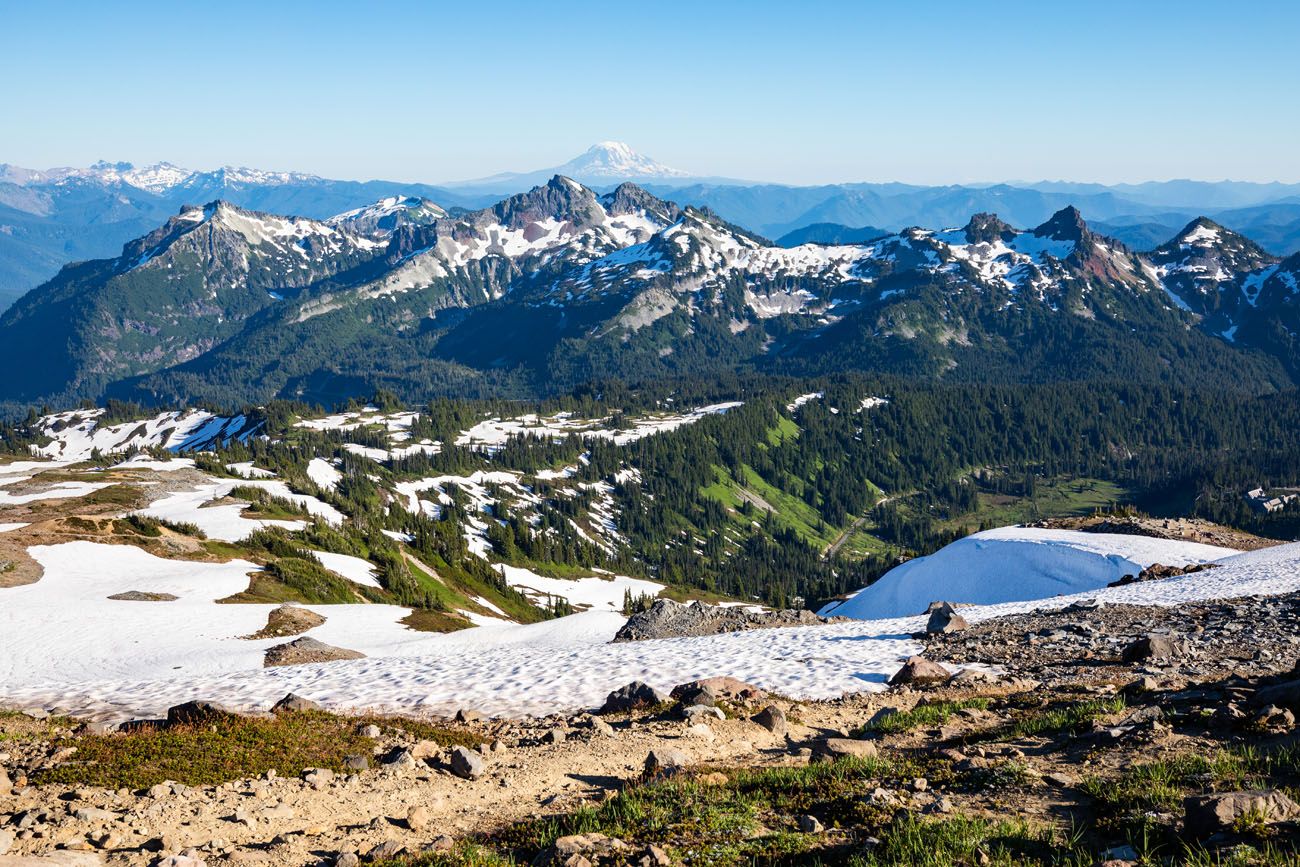
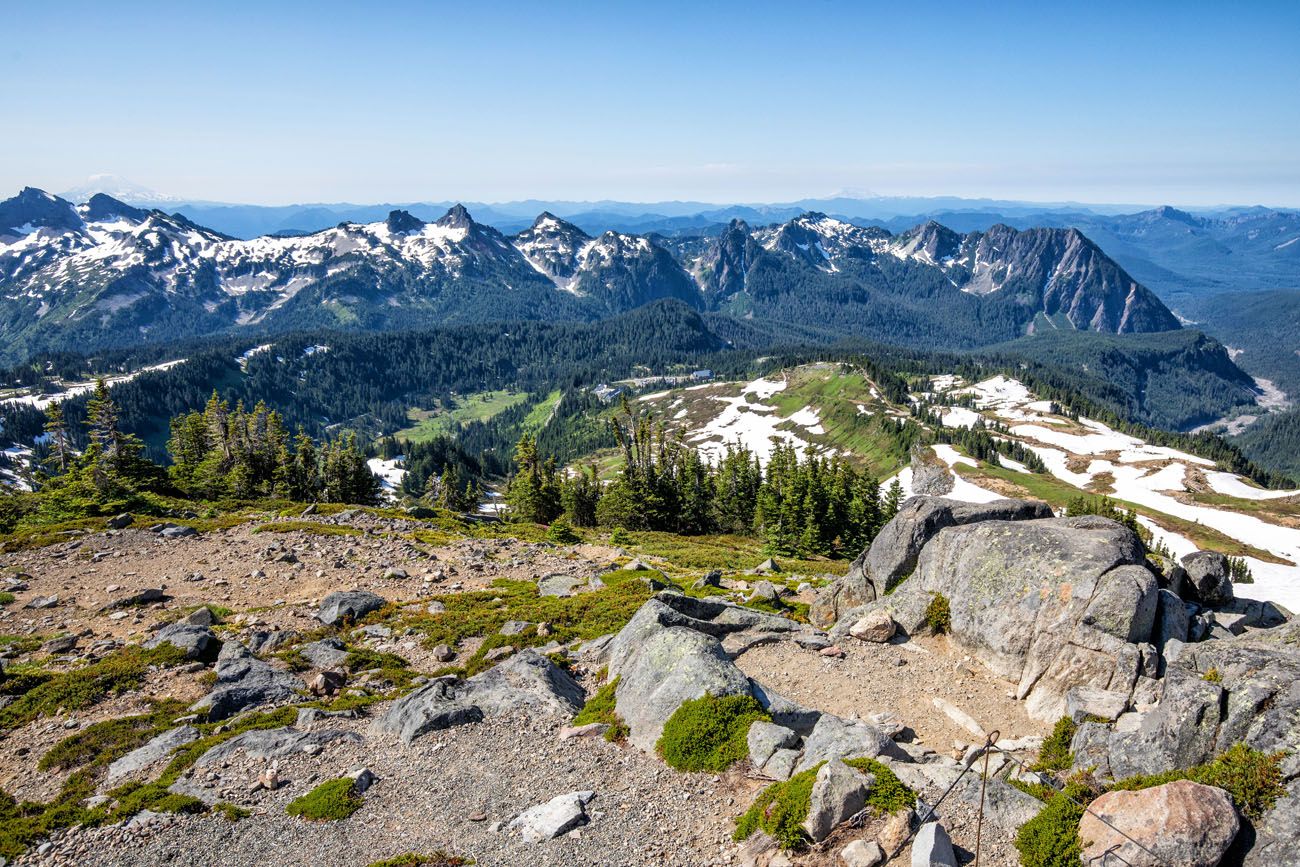
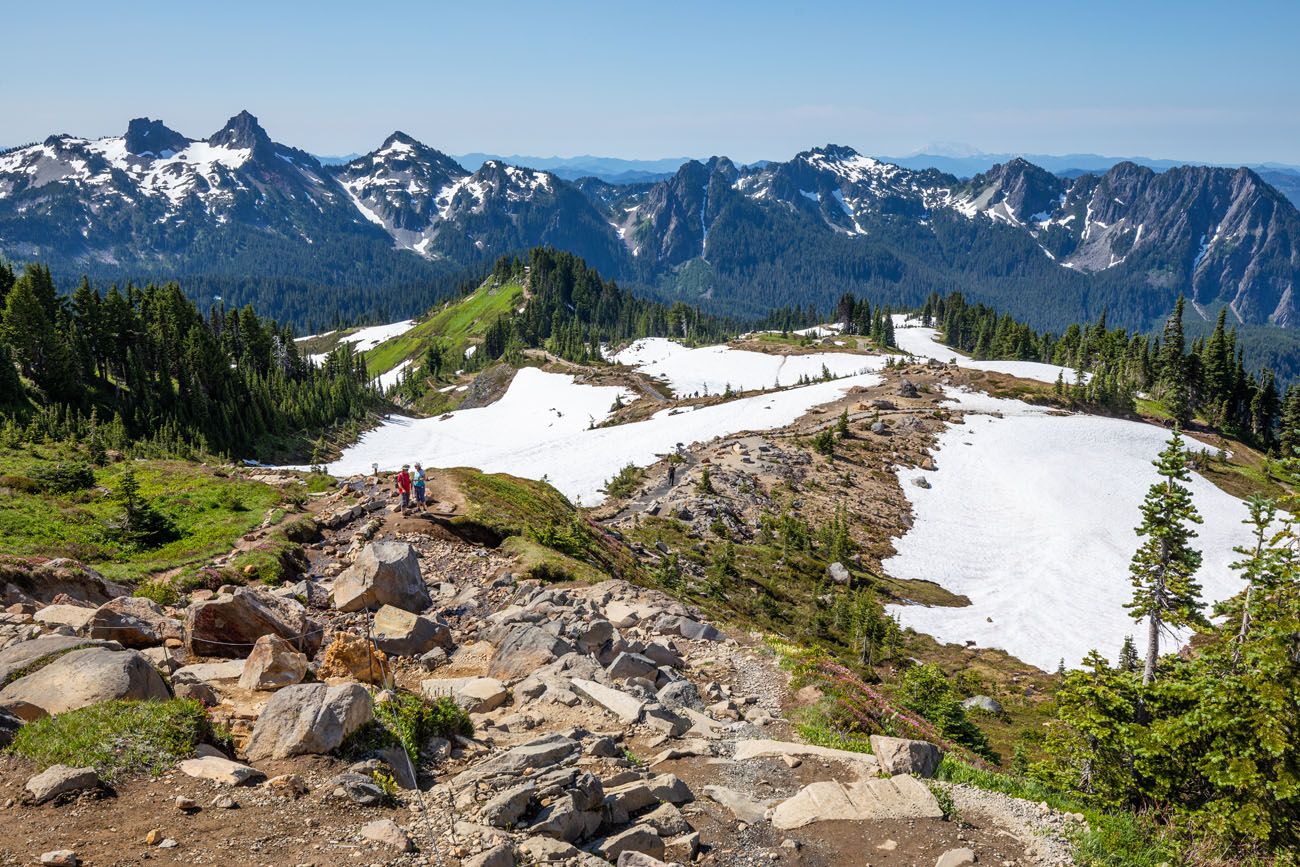
From the very best level on the path, you get one of the best view of the hike. Unfold out under you is Paradise. On a transparent day, you can even see Mt. Adams and Mt. St. Helens, and for those who actually look arduous, Mt. Hood in Oregon. At this level you might be additionally shut sufficient to Mt. Rainier you could hear the glacier popping and cracking.
To the proper, the Pebble Creek Path heads up Mt. Rainier. For these mountaineering to Camp Muir and those that are beginning their ascent to the height of Mt. Rainier, that is path that takes you increased up the mountain.
From right here, it’s a downhill stroll again to Paradise. The views are higher from right here than from Panorama Level (only a brief distance down the path from this spot) so take your time and luxuriate in this view. It’s additionally so much quieter. Many individuals hike out-and-back alongside the Skyline Path simply to Panorama Level, so count on extra site visitors on the path as you head again to Paradise.
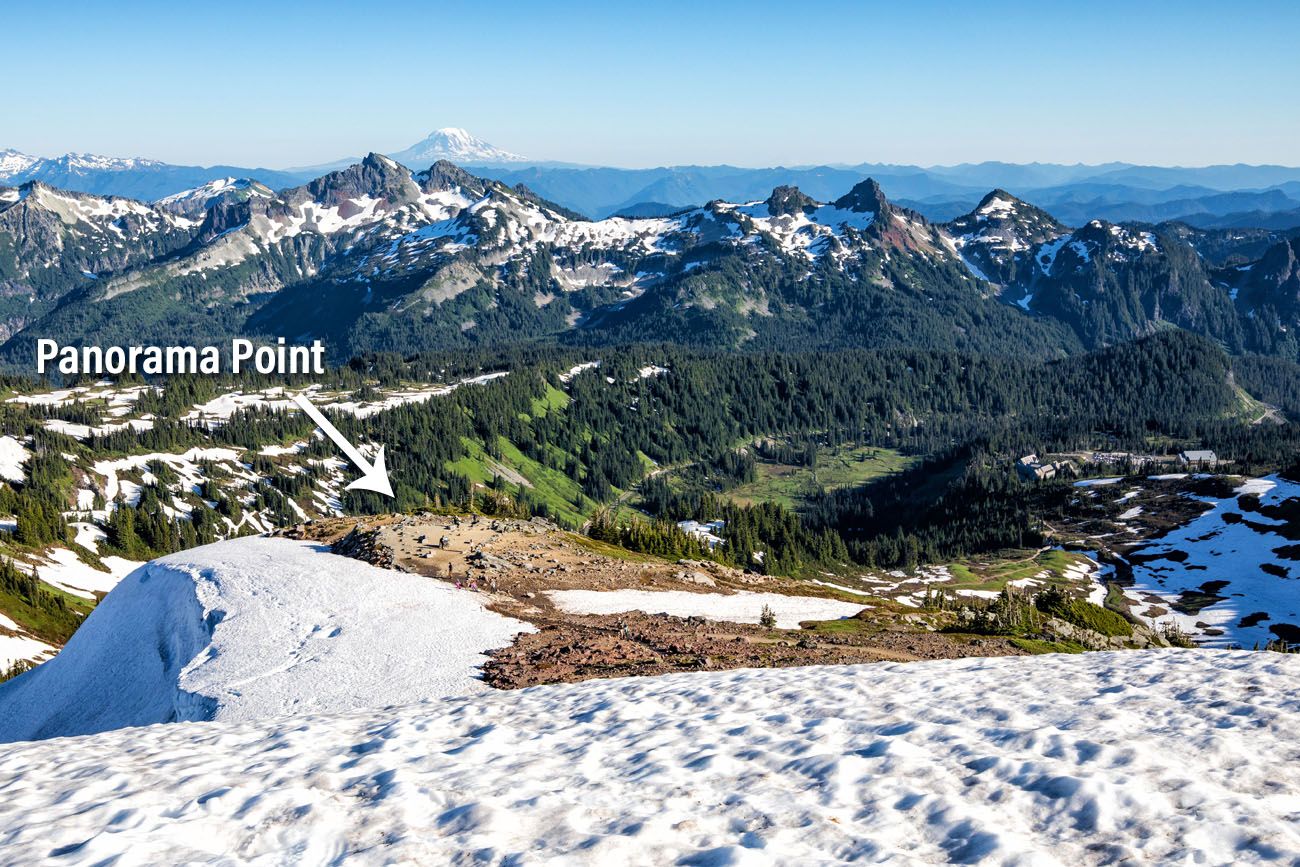
Panorama Level
It’s a brief, steep hike right down to Panorama Level. The view is much like what you had simply a short while in the past, however it’s nonetheless value a fast break to benefit from the view.

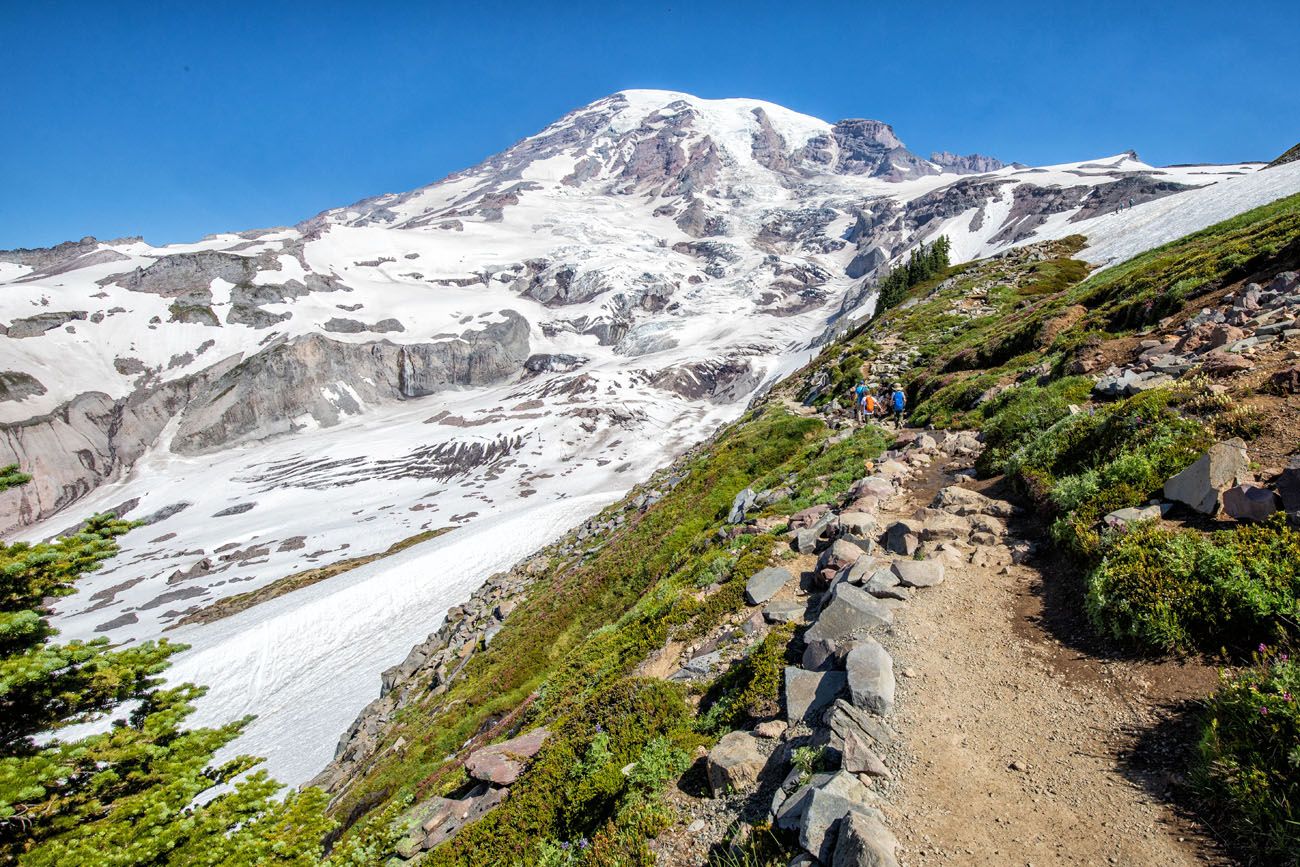
The view as much as Mt. Rainier from Panorama Level.
To the Customer Heart
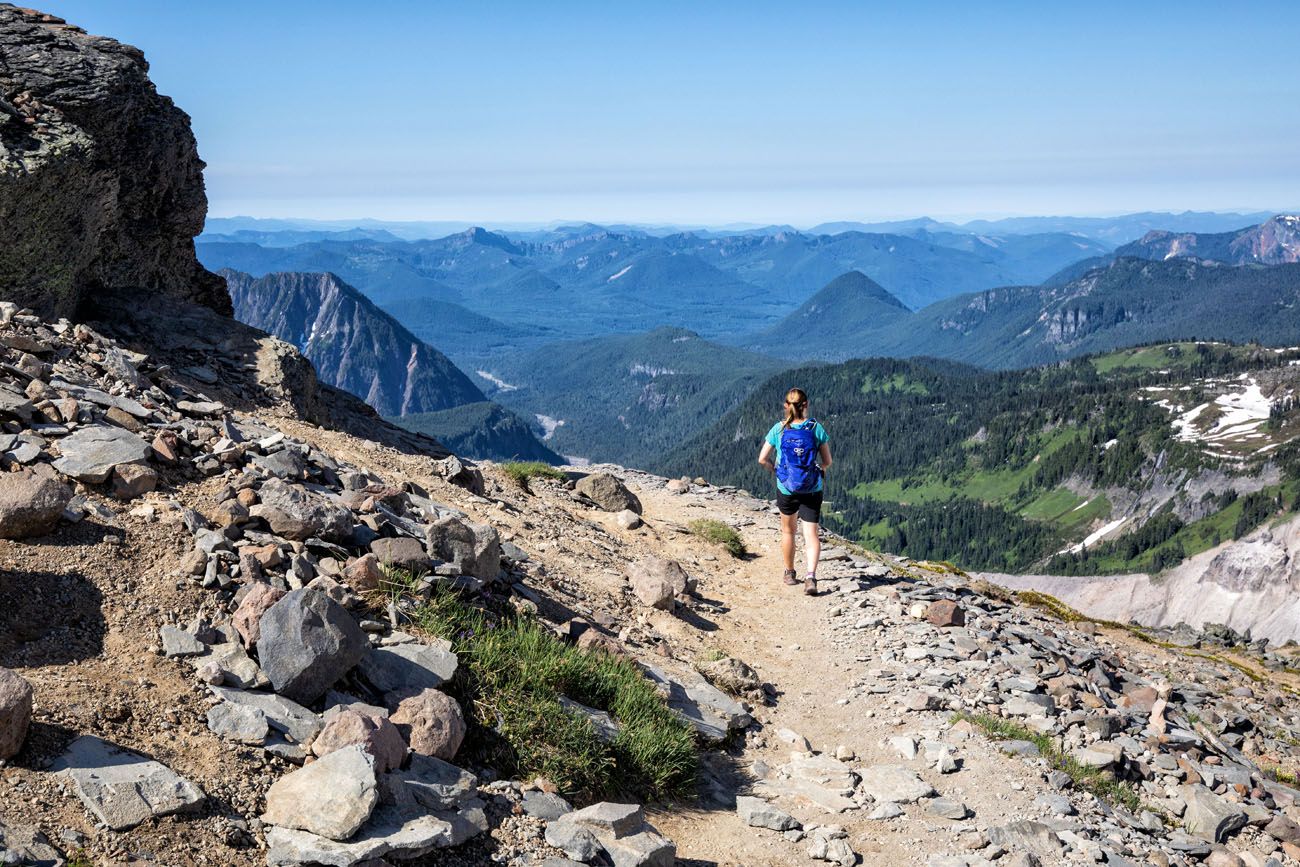
From Panorama Level, it’s a downhill stroll to the customer middle. Mt. Rainier is now behind you, so don’t overlook to show round and look again at it often.
On the way in which down, you possibly can take the detour out to Glacier Vista to get a more in-depth view of the glacier on Mt. Rainier. It rejoins the Skyline Path so it doesn’t add a lot time or distance to the hike.

Glacier Vista
As you stroll again to the customer middle, the path splits a number of occasions. Proceed to observe the indicators to remain on the Skyline Path. Nonetheless, for those who make a mistaken flip, all of them find yourself on the customer middle sooner or later (however the Skyline Path would be the quickest means again). When you begin strolling on a paved path once more you recognize you might be getting near the customer middle.
Tricks to Have the Greatest Expertise
To get a parking house, plan on arriving by 9 am, particularly for those who plan to go to Paradise in the summertime months. If it’s a Saturday, Sunday, or a vacation, arrive by 8 am to make sure you get a parking house.
Examine the climate forecast earlier than you do that hike.
Depart no hint. If you find yourself within the park, follow the seven rules of Depart No Hint. This consists of packing out what you deliver into the park, be thoughtful of different hikers, keep on the path, and don’t take away something from the park.
Get updates on path circumstances and closures on the Nationwide Park Service web site.
What to Deliver on the Hike
Mountaineering sneakers. Don’t do that hike in something apart from mountaineering sneakers or mountaineering boots. There’s an excellent likelihood you’ll hike via snow, even in the summertime.
Mountaineering poles. Mountaineering poles take the stress off of your legs and assist to ease leg ache and fatigue. In addition they enable you to hold your stability on the snow crossings.
Crampons will also be useful for the snow crossings, though we did simply nice with out them.
Water and snacks. At the very least 2 liters of water in the summertime.
Sunscreen, hat, and sun shades. For many of this hike you’ll be uncovered to the solar, with little or no shade.
Digicam. Even a smartphone will do.
Rain jacket or fleece. Be ready for all climate circumstances, even snow in the summertime months. Pack a rain jacket and/or fleece and even one other layer of clothes.
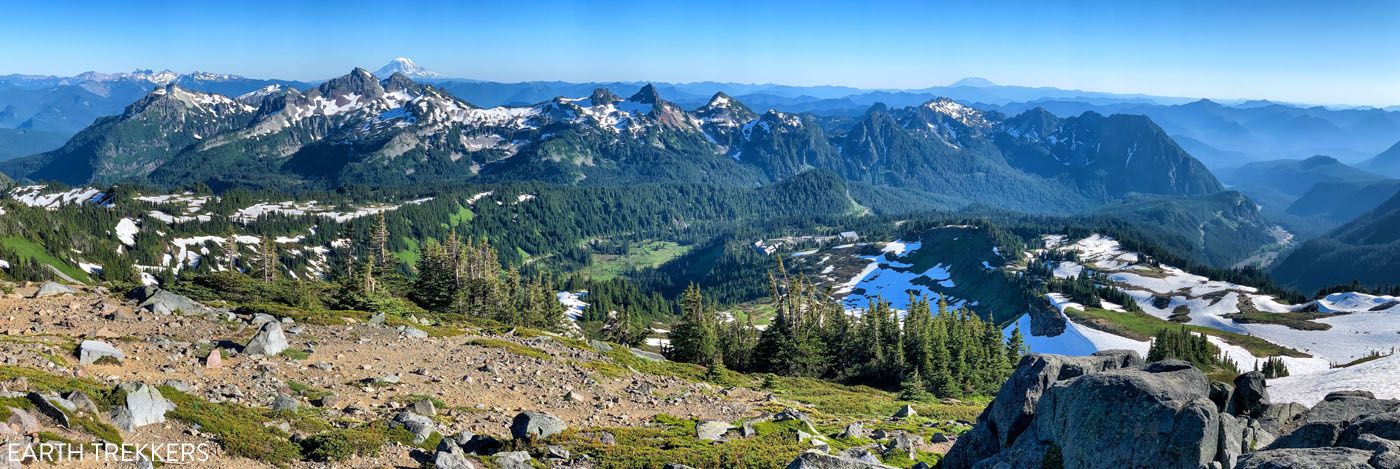
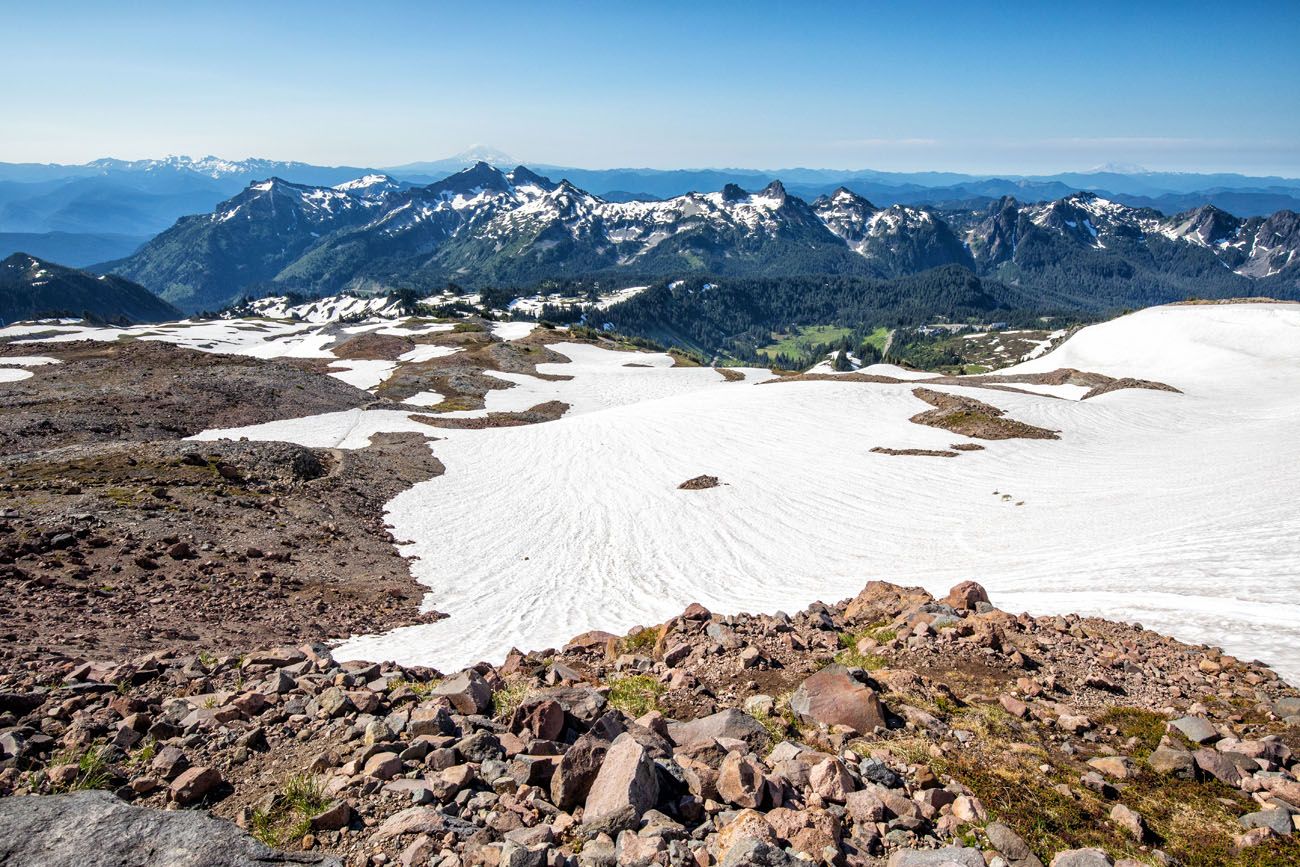
Panorama from Panorama Level, taken with an iPhone.
Extra Details about Washington State
ROAD TRIP IDEA: Washington Highway Journey Itinerary: 7 to 14 Days within the Nationwide Parks
MOUNT RAINIER: 14 Wonderful Issues to Do in Mount Rainier Nationwide Park
MOUNT RAINIER: The Good Mount Rainier Nationwide Park Itinerary
MOUNT RAINIER: Mountaineering the Mount Fremont Lookout Path
MOUNT RAINIER: Learn how to Hike the Summerland Path to Panhandle Hole
MOUNT RAINIER: 15 Epic Day Hikes in Mount Rainier Nationwide Park
OLYMPIC: Learn how to Hike the Klahhane Ridge Path to Mount Angeles
NORTH CASCADES: The Full Information to North Cascades Nationwide Park
NORTH CASCADES: Learn how to Hike Cascade Go and Sahale Arm
ENCHANTMENTS: Learn how to Hike the Core Enchantments in One Day
NATIONAL PARKS: Washington Nationwide Parks: Journey Information & Highway Journey Itinerary