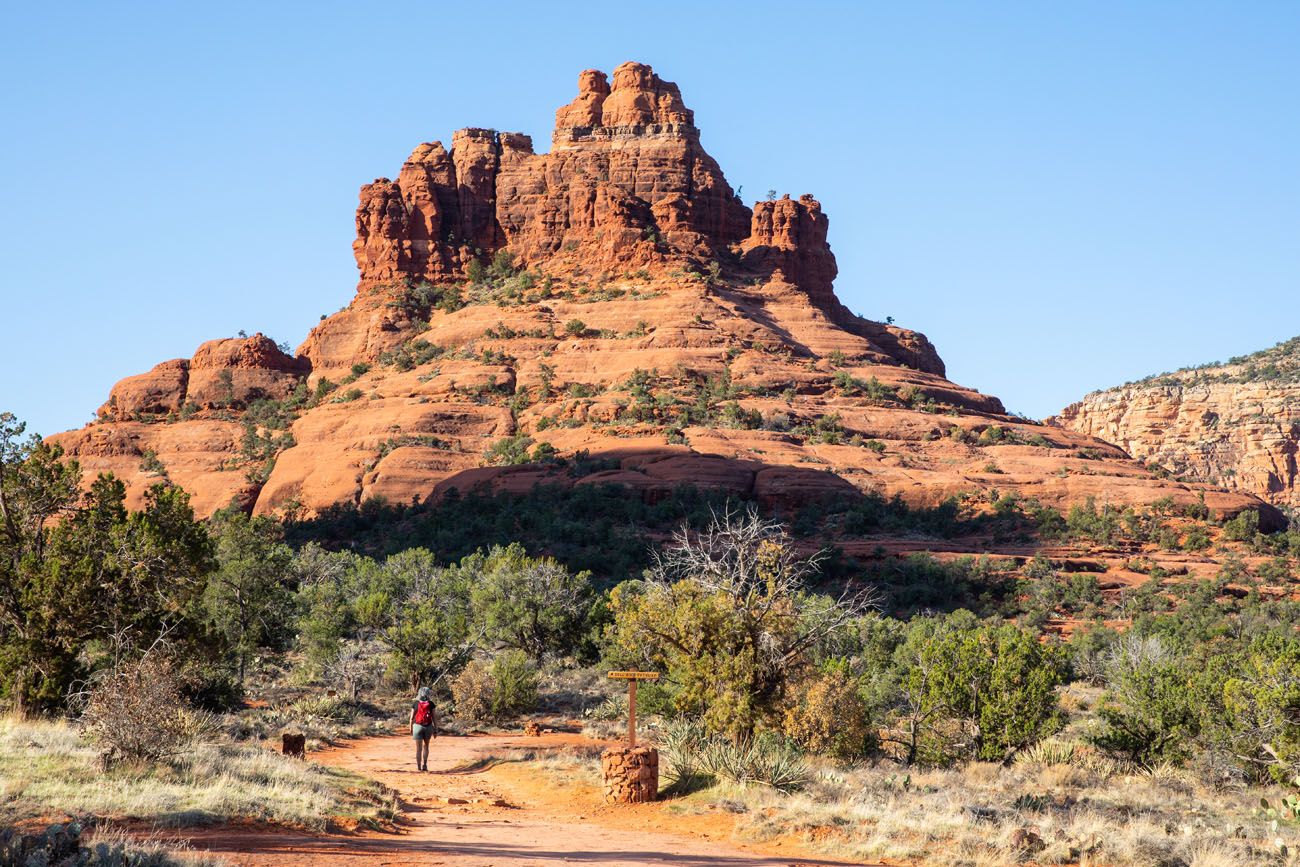
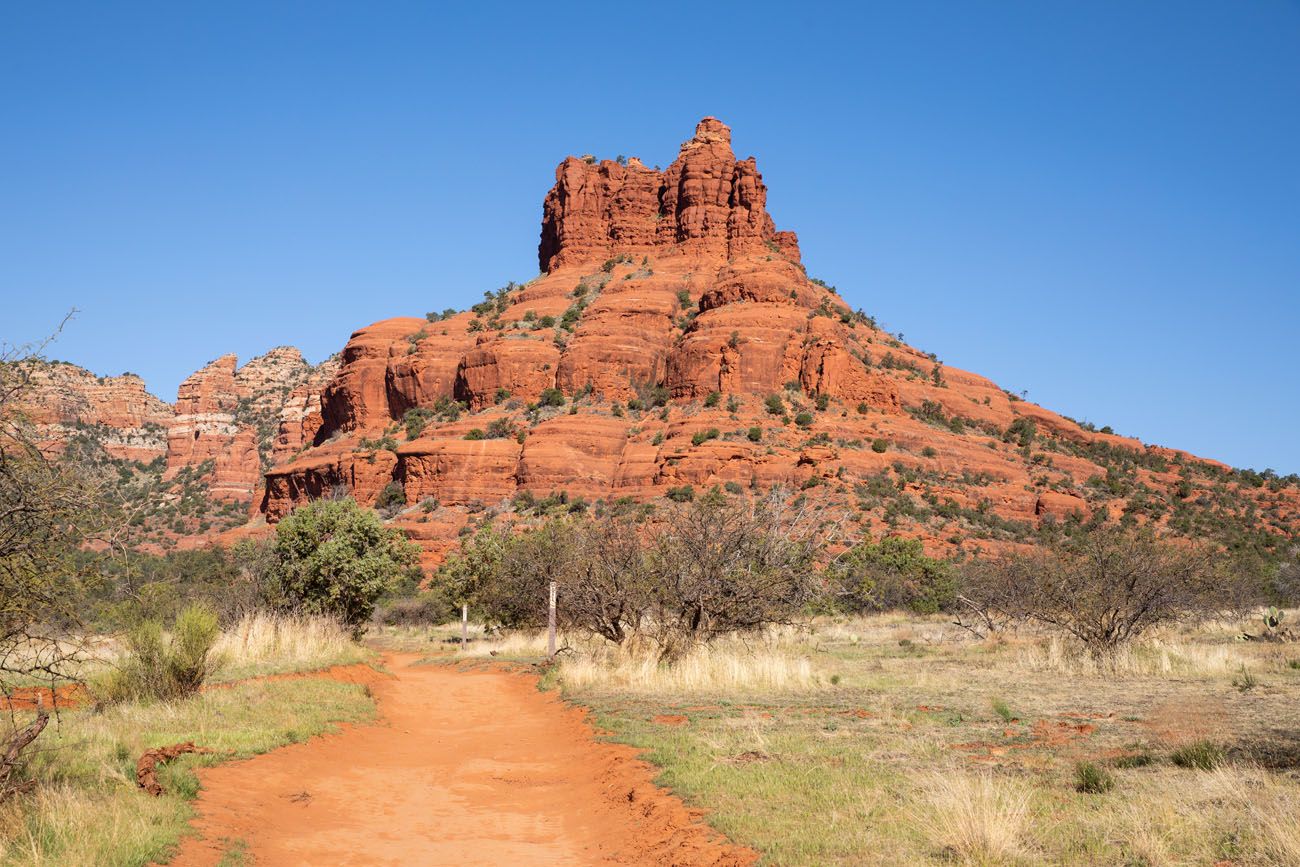
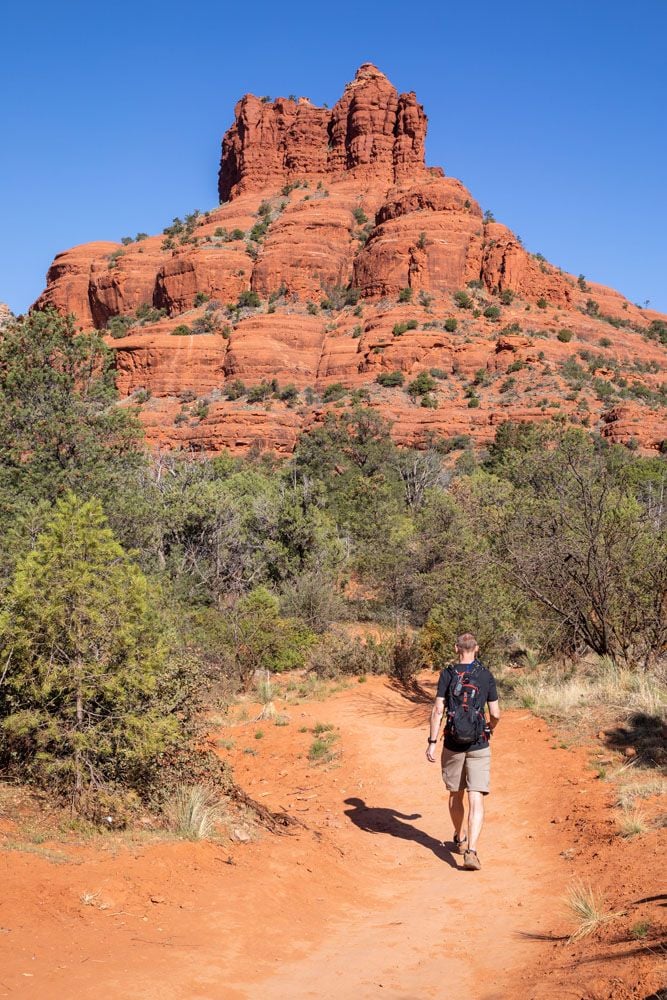
If you’re in search of a simple hike with nice views of two of Sedona’s most iconic formations, Bell Rock and Courthouse Butte, then put the Bell Rock and Courthouse Loop Butte Path in your to do checklist.
This hike is completed as a loop, so your views are all the time altering. It’s a comparatively flat hike so it’s nice for all ages and skill ranges. On the finish of the hike, you’ve the choice so as to add on the climb up Bell Rock, which we extremely suggest. The views are phenomenal!
Climbing Stats
Bell Rock and Courthouse Butte Loop Path
Distance: 4 miles
Complete Elevation Achieve: 400 toes
Issue: Straightforward
Size of Time: 1.5 to 2.5 hours
Bell Rock and Courthouse Butte Loop Path + Bell Rock Climb
Distance: 4.6 miles
Complete Elevation Achieve: 800 toes
Issue: Reasonable
Size of Time: 2 to 4 hours
Bell Rock Climb Solely
Distance: 1 mile
Complete Elevation Achieve: 400 toes
Issue: Reasonable
Size of Time: 1 to 2 hours
Extra Data
When to Go: All 12 months. The most effective time is the spring and fall, when temperatures are delicate, however count on large crowds. Through the summer season, count on very popular temperatures however decrease crowds. Within the winter, temperatures can get under freezing however crowds are additionally decrease.
Location: Village of Oak Creek
Crimson Rock Go: You will want to buy a Crimson Rock Go to do that hike. The cross prices $5 per day or $15 for one week. The cross will be bought on the payment machine on the trailhead (bank cards solely). You probably have an America the Lovely Go, you should utilize this relatively than buying a Crimson Rock Go.
Please apply the seven ideas of Go away No Hint: plan forward, keep on the path, pack out what you convey to the mountaineering path, correctly get rid of waste, go away areas as you discovered them, reduce campfire impacts, be thoughtful of different hikers, and don’t strategy or feed wildlife.
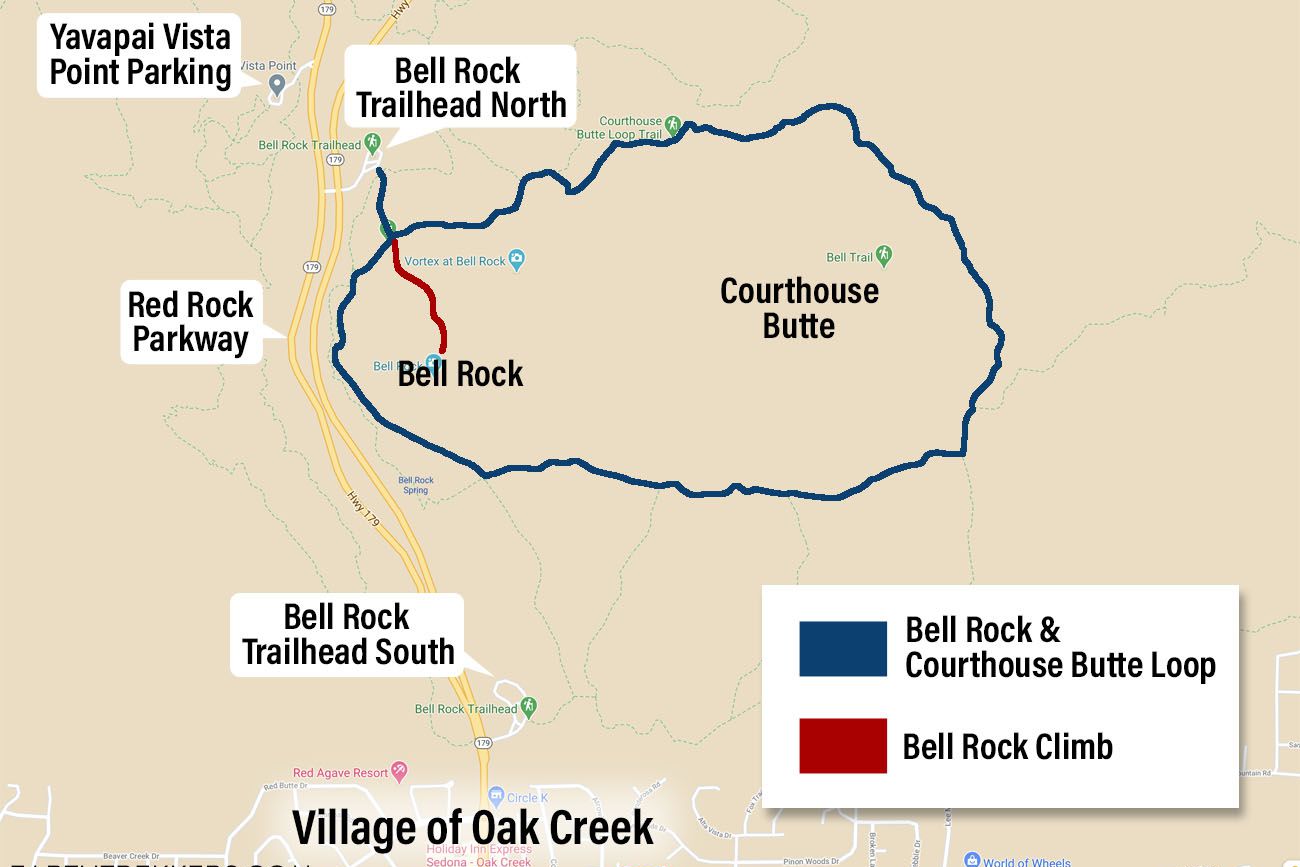
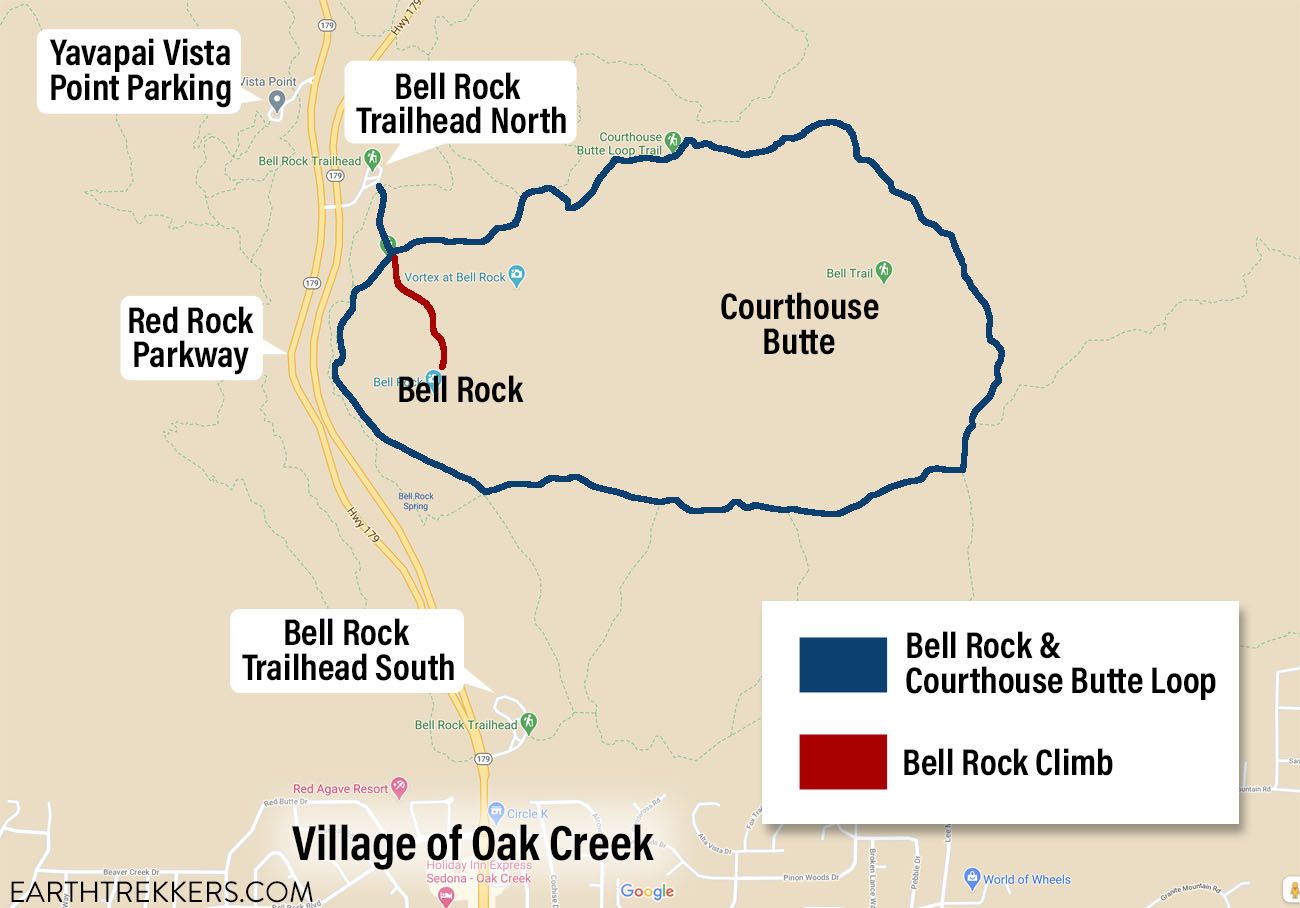
The place to Park
There are two Bell Rock trailhead parking heaps and on Google, they each have the identical identify (Bell Rock Trailhead). For this submit, I’m referring to the northernmost lot as Bell Rock Trailhead North and the southernmost lot as Bell Rock Trailhead South (see the map above).
Bell Rock Trailhead North
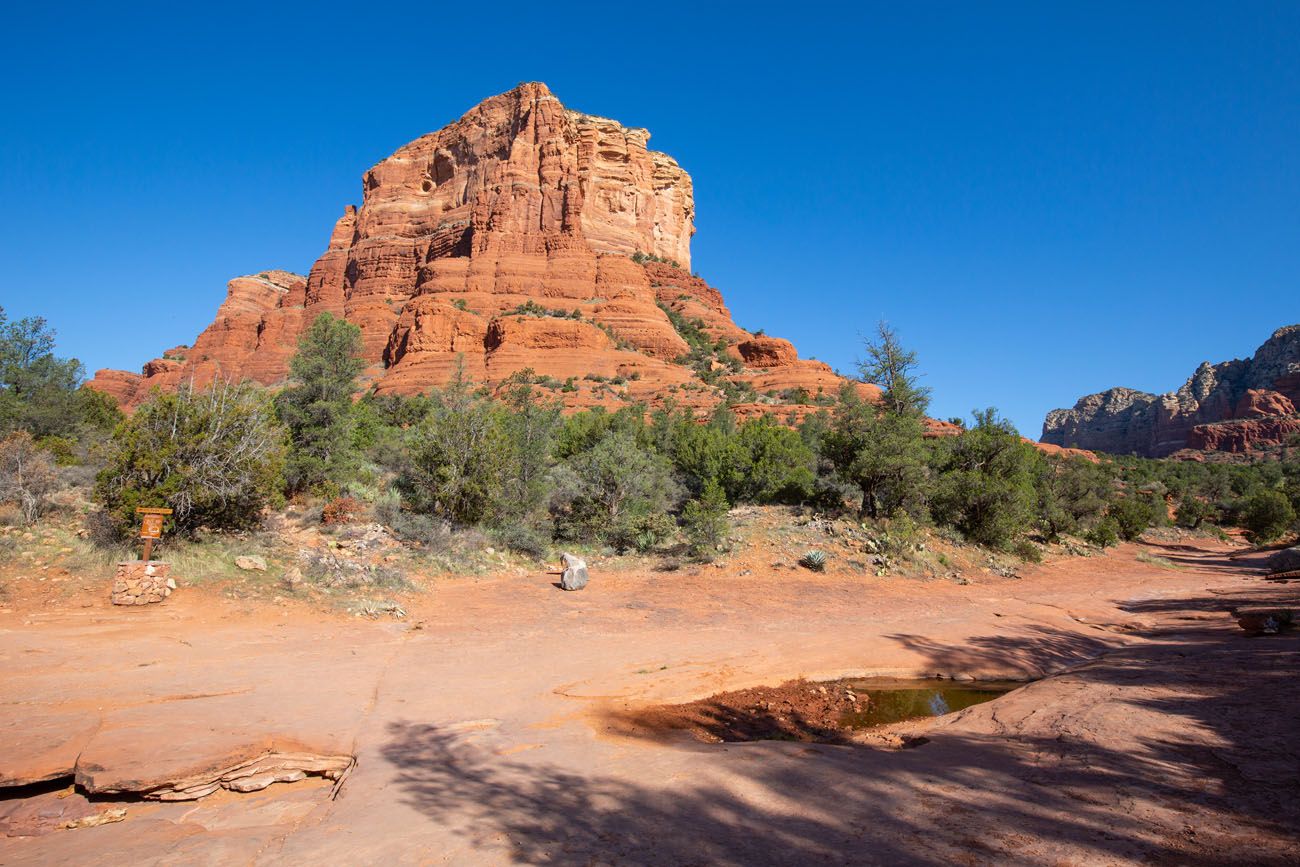
The most effective place to park is on the Bell Rock Trailhead North. This parking zone is positioned on the northbound part Crimson Rock Scenic Byway. This pretty massive lot has a vault rest room and a machine the place you should buy your Crimson Rock Go. This lot is the closest you will get to the mountaineering path.
Once we did this hike in April 2021, the lot was utterly full by 7:20 am. For those who don’t thoughts some further strolling, there are two extra locations to park if the lot is full whenever you do that hike.
Yavapai Vista Level
The following closest parking zone is Yavapai Vista Level. This parking zone is positioned on the southbound part of the Crimson Rock Parkway.
From the Bell Rock Trailhead, it takes 8 minutes to drive right here, since it’s important to drive north, flip round on the round-about for Again O Past Street, after which drive south to the Yavapai Vista Level parking zone.
The Yavapai Parking Lot is far bigger so it’s best to have a greater likelihood to seek out parking right here. Simply be aware that that is additionally a secondary parking space for the extraordinarily in style Cathedral Rock hike, so this lot will fill by mid-morning in the course of the busier journey season.
This lot has a vault rest room and a machine to buy your Crimson Rock Go.
From the Yavapai Vista Lot, it takes about 10 minutes to stroll to the Bell Rock Trailhead. You’ll stroll south alongside Crimson Rock Parkway. There’s a dust path you’ll be able to comply with and you’ll have to cross each sections of the street (northbound and southbound) to get to the Bell Rock parking zone.
Bell Rock Trailhead South
For those who couldn’t get parking on the Yavapai Lot, there may be yet one more place to strive. Bell Rock Trailhead South is positioned on Crimson Rock Parkway, simply north of the Village of Oak Creek. This lot has a vault rest room and a machine to buy your Crimson Rock Go.
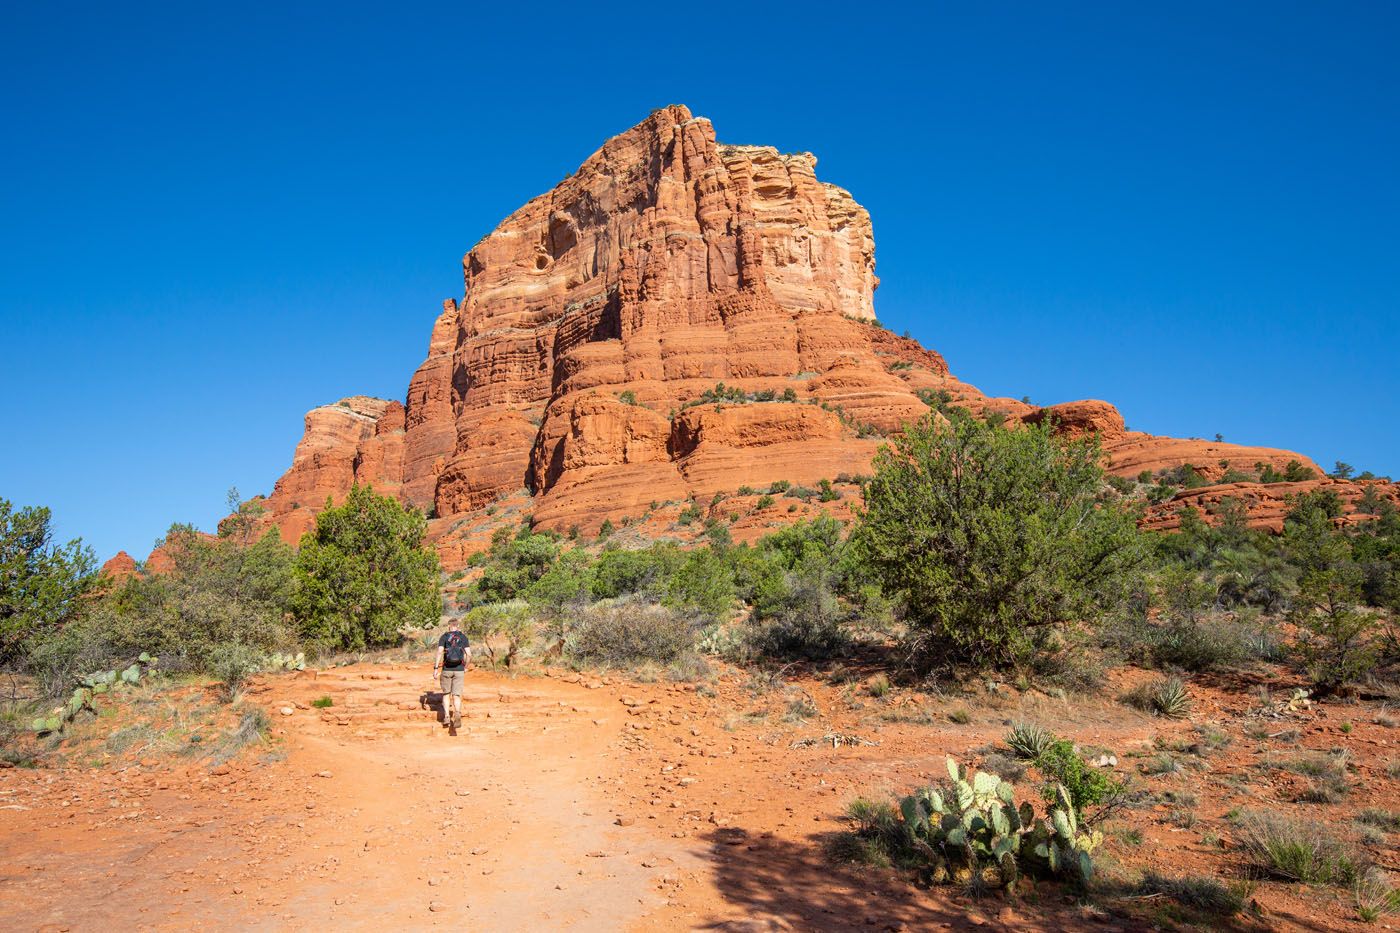
To get to the Bell Rock Courthouse Butte Loop, you’ll hike the Bell Rock Pathway north to the Courthouse Loop Butte Path.
Clockwise or Counter-Clockwise?
Since this can be a loop, you’ll be able to hike it in both path.
We did this hike in a clockwise path. Once we did this, it was a brilliantly sunny morning (we began at 7:40 am). For the primary a part of the hike, we had been strolling straight in direction of the solar (don’t neglect your sun shades!) however as soon as we looped round Courthouse Butte, the solar was at our again and the views had been stunning.
For my part, the most effective views are on the north and south aspect of the loop and it’s price saving these views for the second half of the hike.
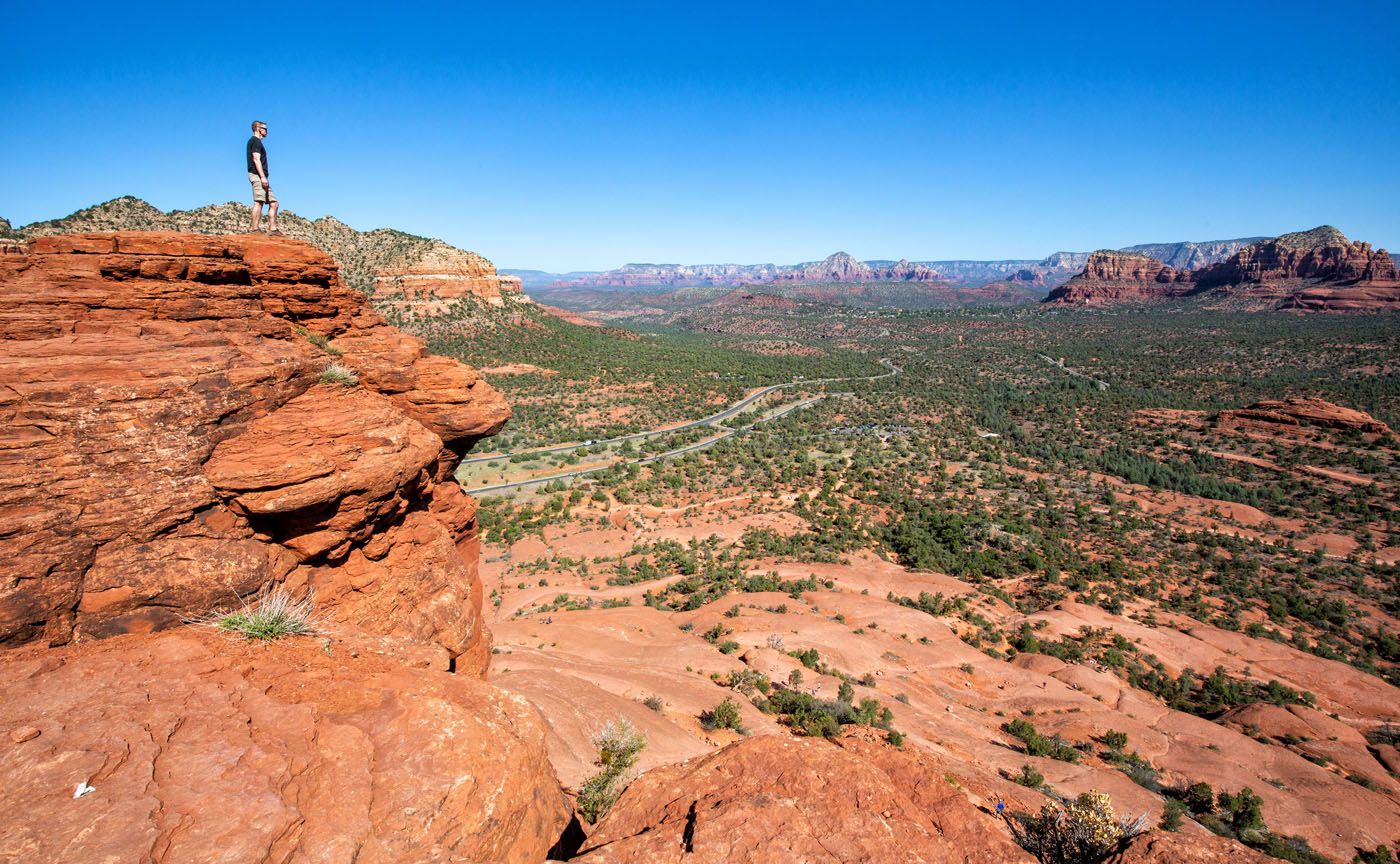
We saved the Bell Rock climb for the top of the hike. This climb is tons of enjoyable and the views are wonderful, so it’s a pleasant strategy to finish the hike.
For those who park on the Bell Rock Trailhead South, you’ll be beginning the hike on the alternative aspect of the loop. For those who select to hike this loop in a clockwise path, then you’ll do the Bell Rock climb in direction of the start of the hike, as you cross by the northern aspect of Bell Rock.

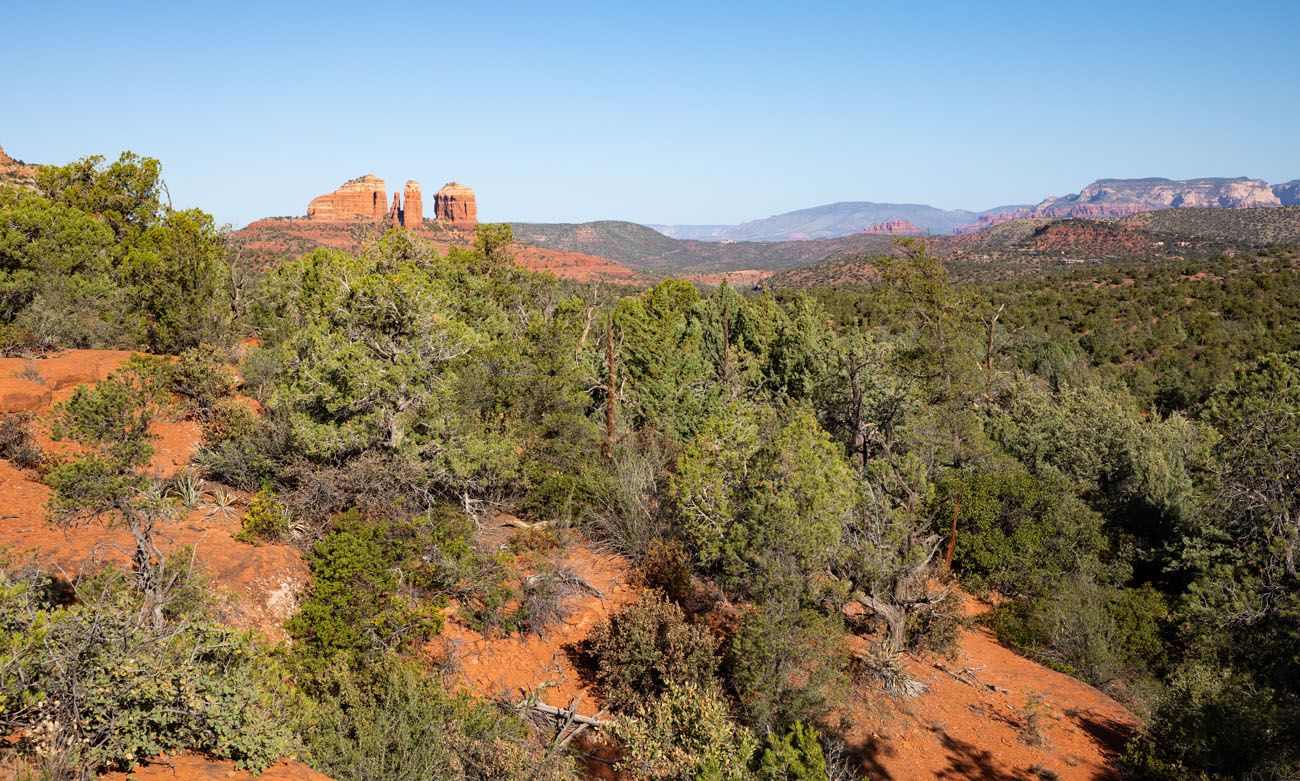
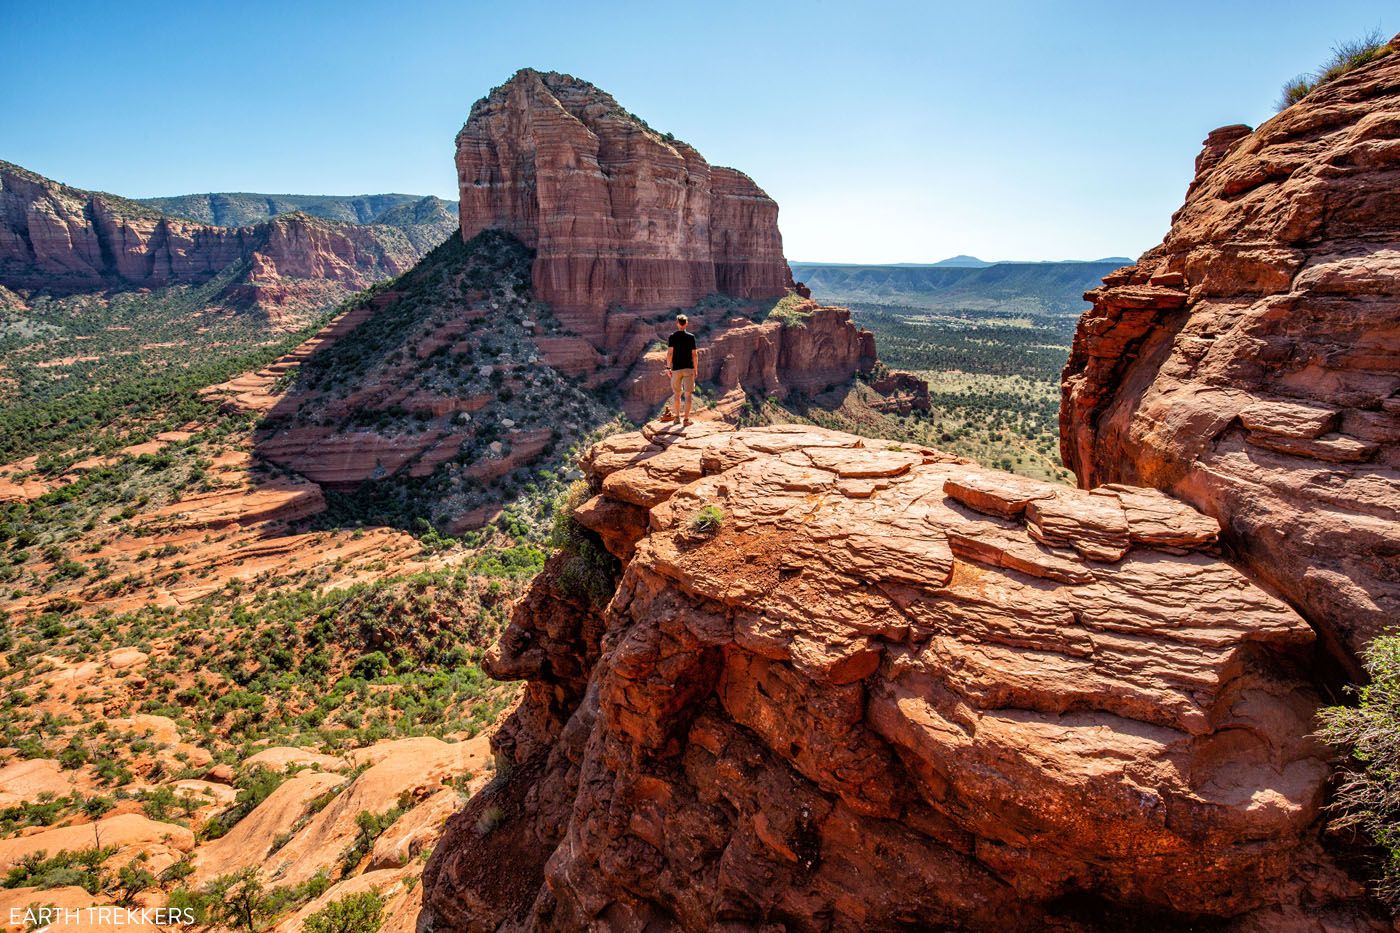
The view of Courthouse Butte from Bell Rock
Bell Rock Courthouse Butte Loop
This path kinds one large loop. You’ll circle round Bell Rock and Courthouse Butte. Alongside the best way, the path modifications names a number of occasions, so it may appear complicated, however there are many path indicators and maps alongside the best way. So long as you retain Bell Rock and Courthouse Butte to your proper try to be transferring within the right path.
That is additionally a well-liked mountain biking spot, so maintain your eyes and ears on alert for mountain bikers.
On the Courthouse Butte Loop Path
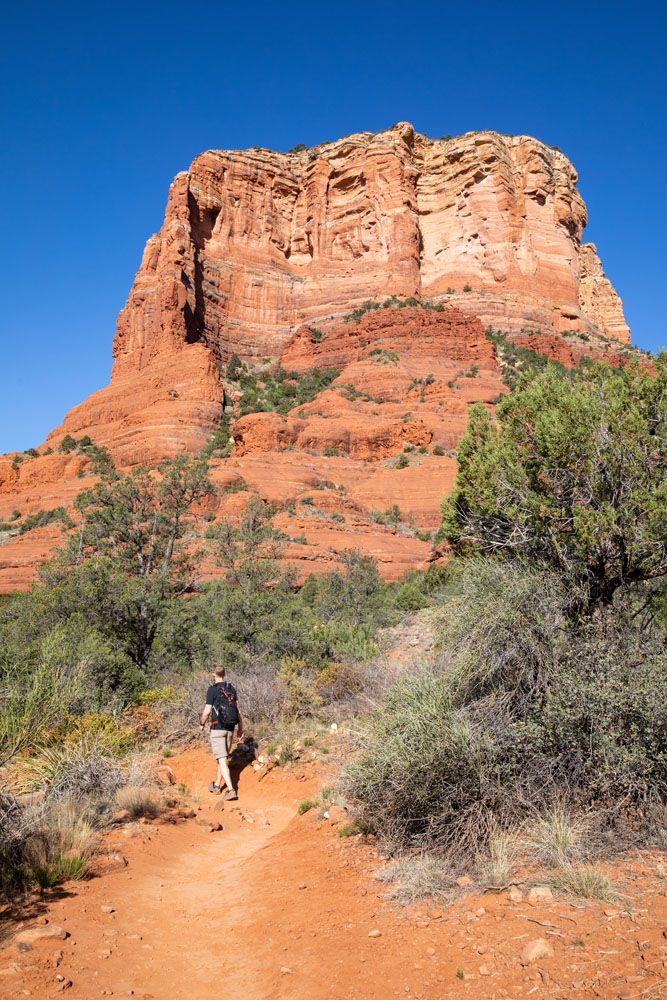
From the Bell Rock Trailhead North, it’s a quick stroll on a large, gravel path, which known as the Bell Rock Entry Path, to get to the loop. This path lifeless ends on the Bell Rock Pathway. Flip left to stroll the loop in a clockwise path.
PRO TRAVEL TIP: Earlier than you flip left and begin the loop, take an excellent go searching at your environment (and even snap just a few photographs) so that you acknowledge this spot whenever you full the loop and know how one can return to the parking space.
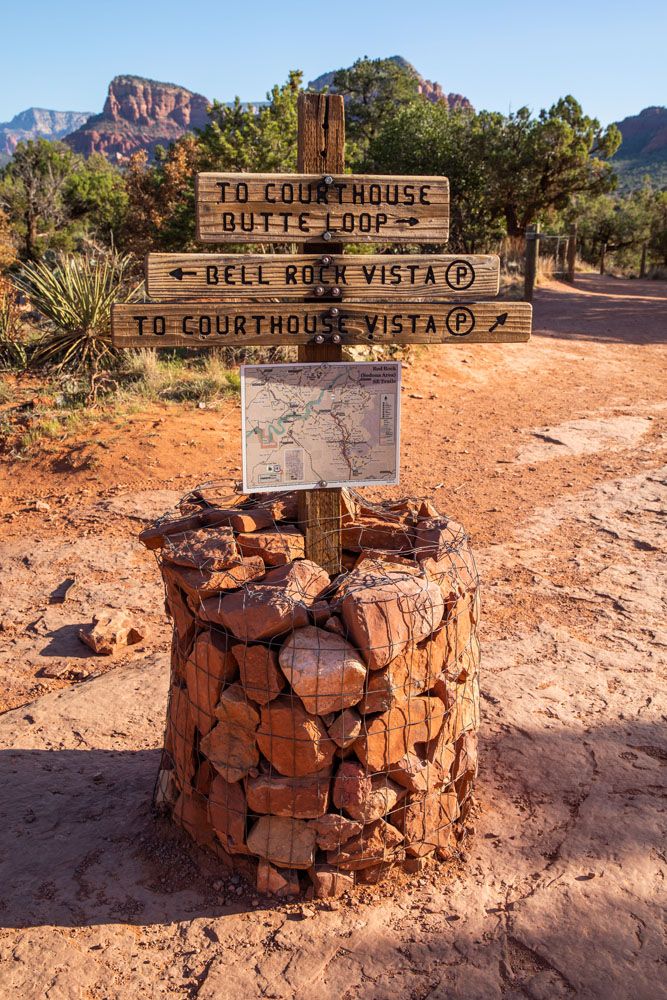
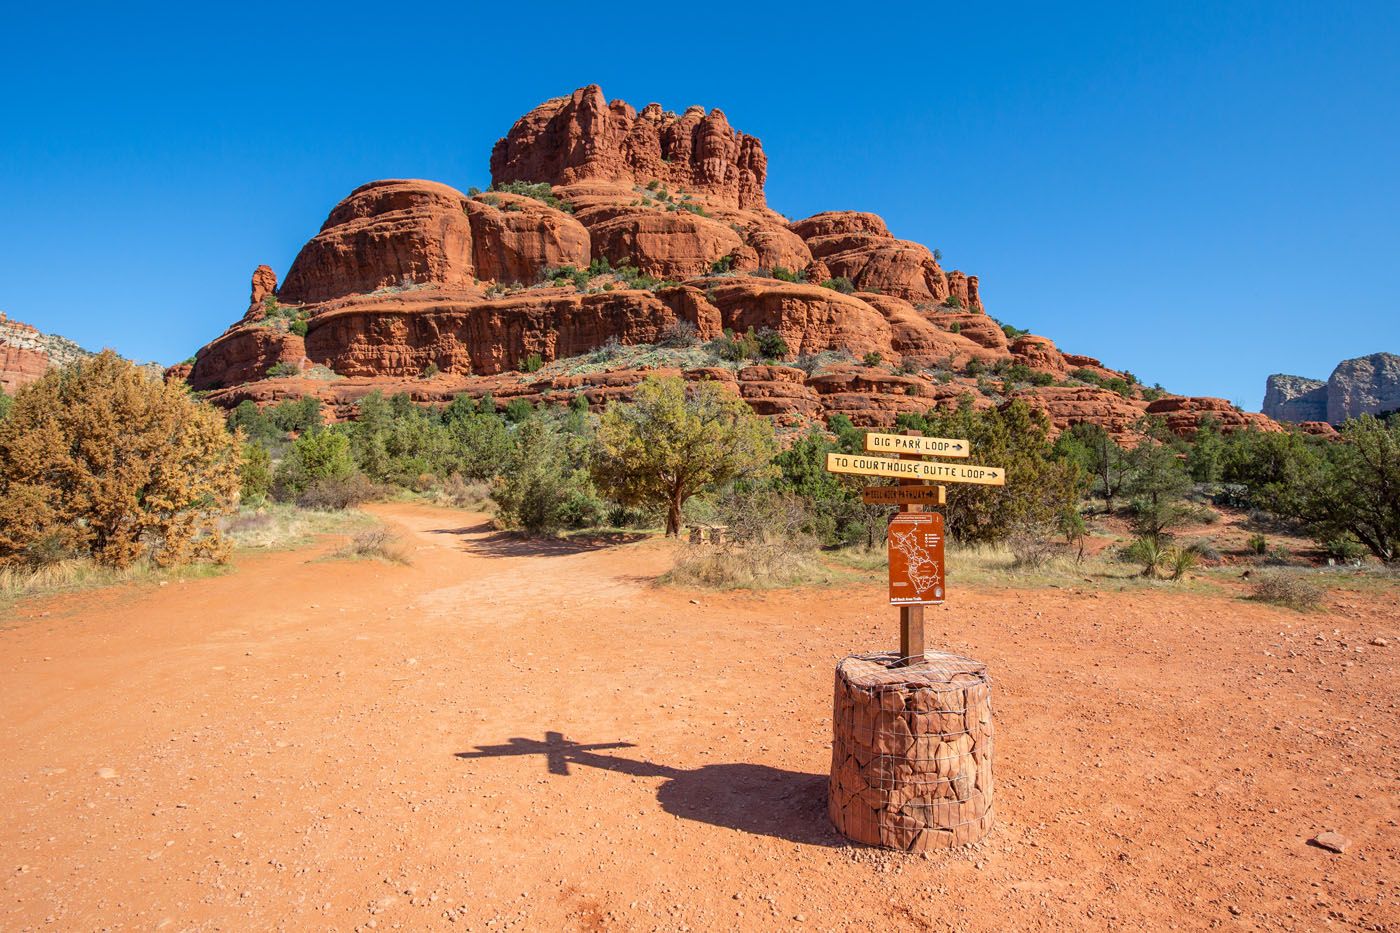
That is the path junction signal whenever you get to the Beth Rock Pathway. Comply with the signal “to Courthouse Butte Loop.”
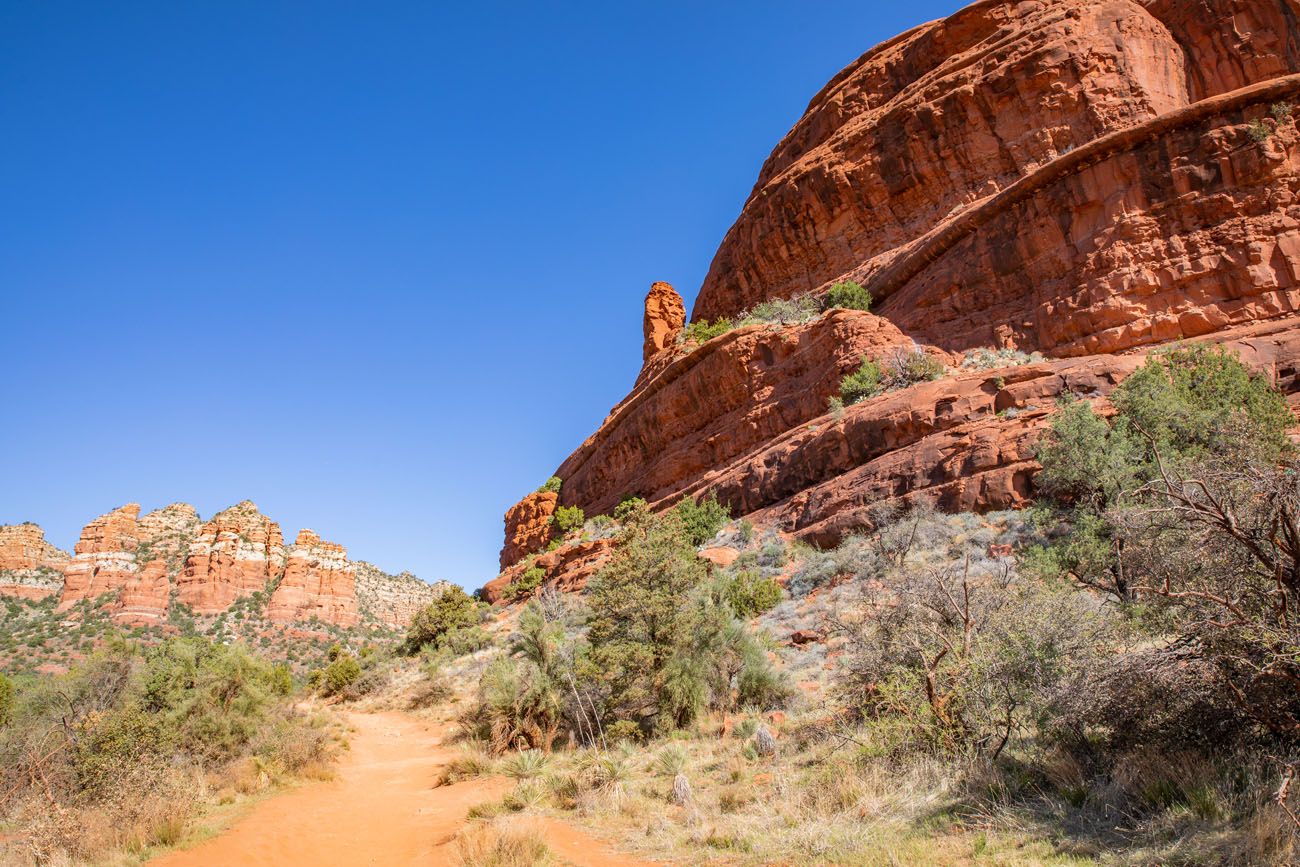
As you stroll across the north aspect of the loop, you’ll have very good views north in direction of Sedona. Courthouse Butte can be towering over you to the south.
The path modifications names just a few occasions on this quick part. From Bell Rock Pathway, take the Llama Path for just a few hundred toes after which the path will fork once more. Take the Courthouse Butte Loop Path. There are path indicators at every of those junctions.
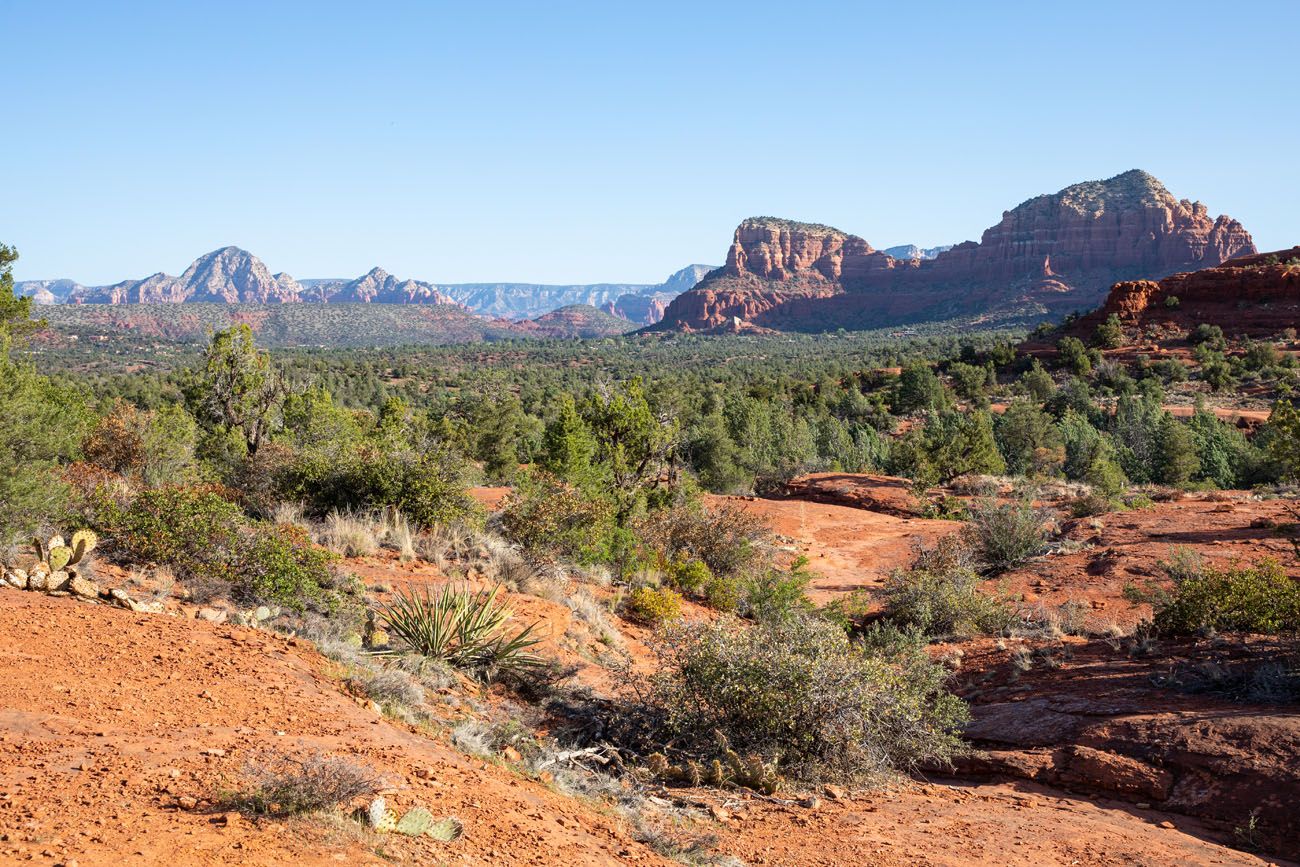
View north from the path. For those who look carefully, you’ll be able to see the Chapel of the Holy Cross.
One other view from the path, this time trying northwest in direction of Cathedral Rock.
On this a part of the hike you’ll be strolling away from Bell Rock, so periodically flip round to check out it.
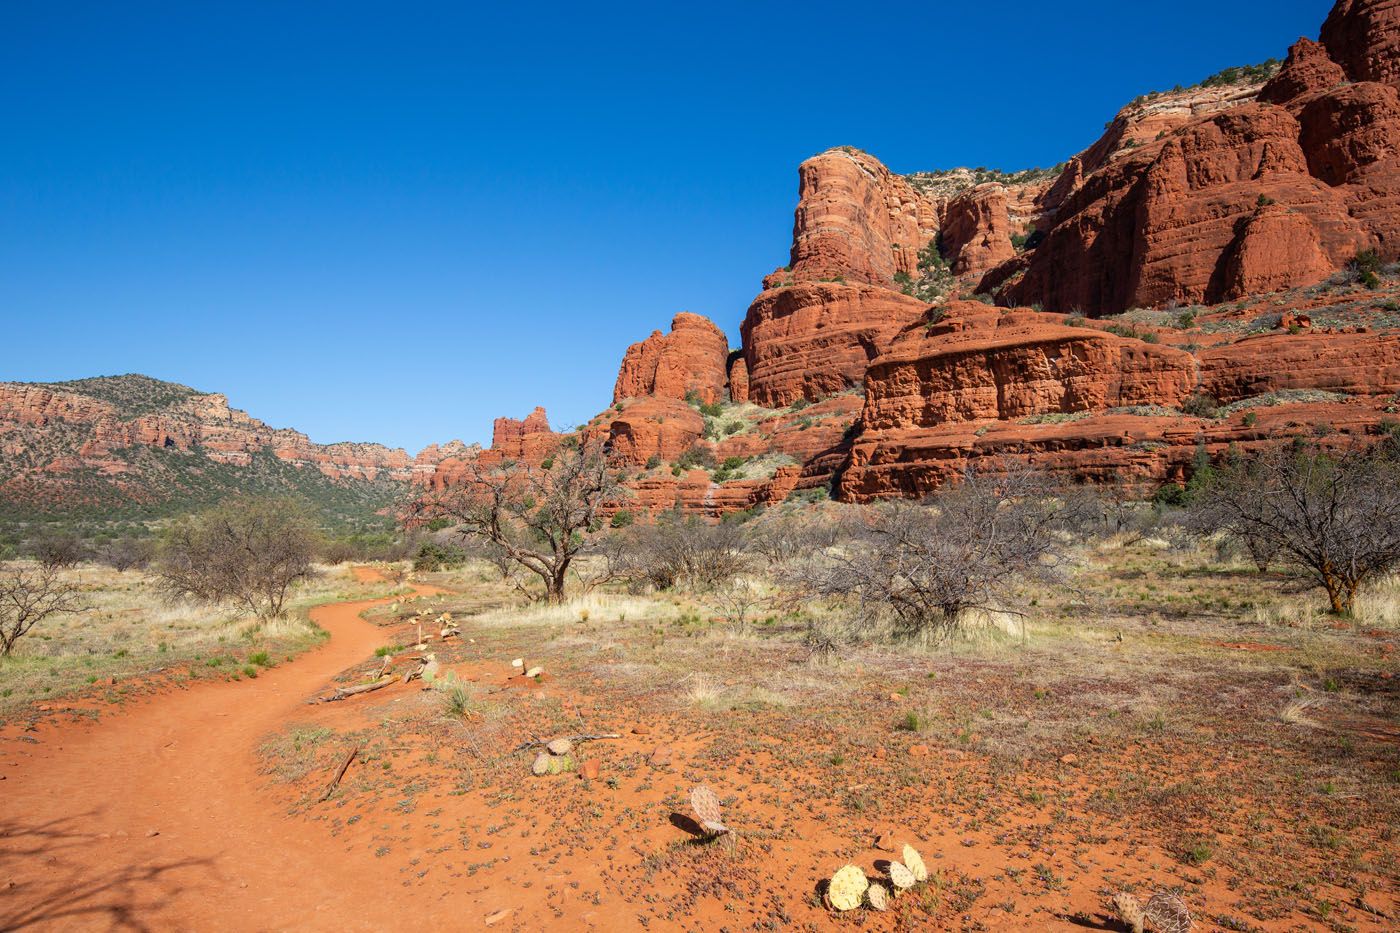
Comply with the Courthouse Butte Loop Path round Courthouse Butte. As soon as on the japanese aspect of the loop you’ll have nice views of Courthouse Butte.
2 miles into the hike you’ll strategy a large wash. There are two path indicators right here, pointing in two totally different instructions, every with the identical path identify, Massive Park Loop. Cross the wash (strolling in direction of Courthouse butte) and comply with that signal for Massive Park Loop. You will have now reached the top of the Courthouse Butte Loop Path and you’ll be following the Massive Park Loop path.
Word: On Google and All Trails, this path continues to be labeled as Courthouse Butte Loop Path however the park indicators have a distinct identify, Massive Park Loop.
A photograph of the wash. Cross this wash to the path signal on the alternative aspect to proceed the hike.
Additional down the path you’ve an important view of Courthouse Butte.
At mile 2.6, there’s a signal telling you to go straight for Massive Park Loop or to go left for Massive Park Loop. Go straight at this signal. You’ll be strolling in direction of Bell Rock.
At mile 2.75, comply with the signal that claims “To Bell Rock Pathway”. You’ll once more be strolling in direction of Bell Rock.
At mile 3.0, the path identify modifications again to the Bell Rock Pathway and you’ll comply with this again to your start line. As you strategy the top of the loop, you will notice a path signal labeled “Bell Rock Climb.” That is the path to take to climb up Bell Rock.
Climbing alongside the aspect of Bell Rock
Bell Rock Climb
The Bell Rock climb begins on the signal that’s labeled “Bell Rock Climb.”
For the primary 0.25 miles of the climb you’ll be following path indicators. The path indicators are then changed with wire baskets crammed with rocks. Comply with these baskets to the higher ranges of Bell Rock.

Finally, the wire baskets will finish however you’ll be able to proceed to hike increased by doing your personal route discovering.
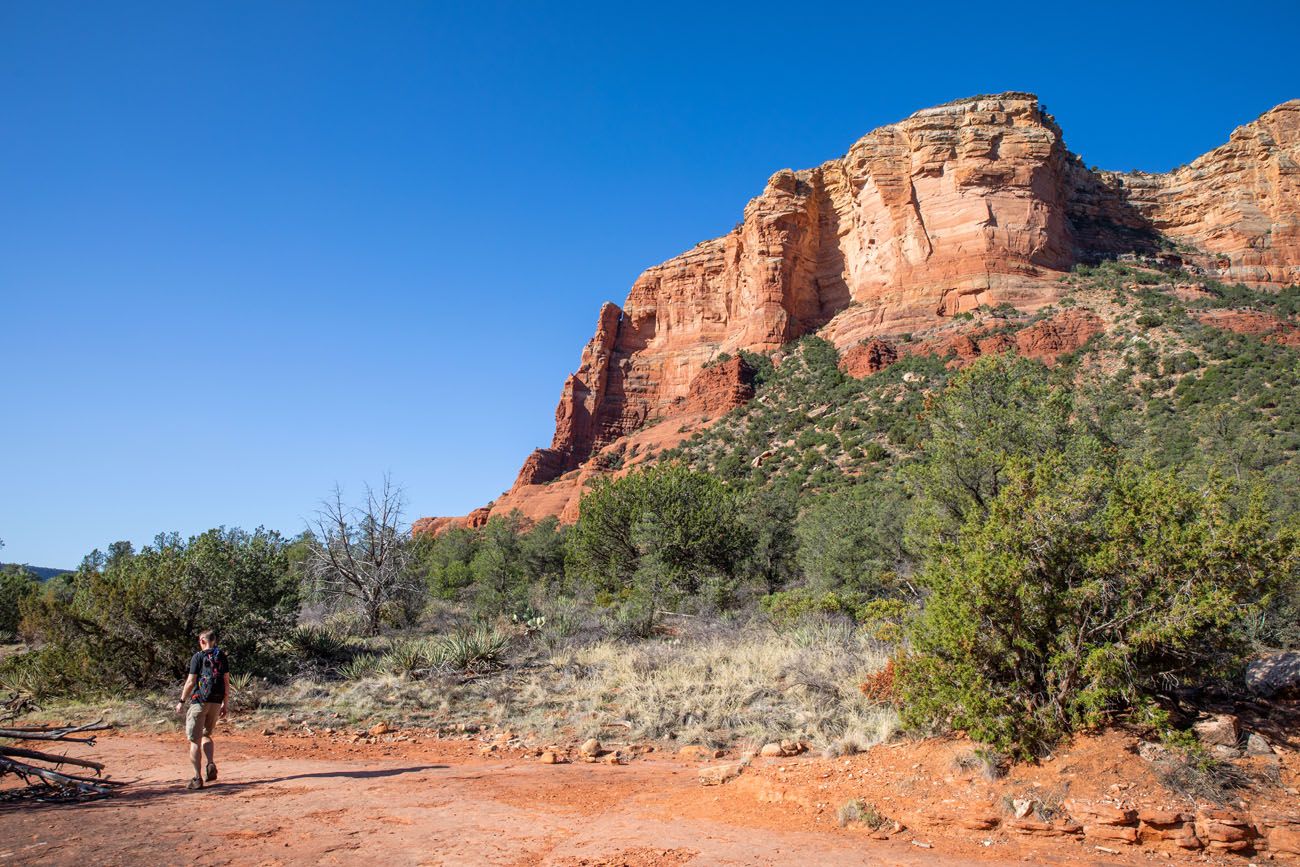
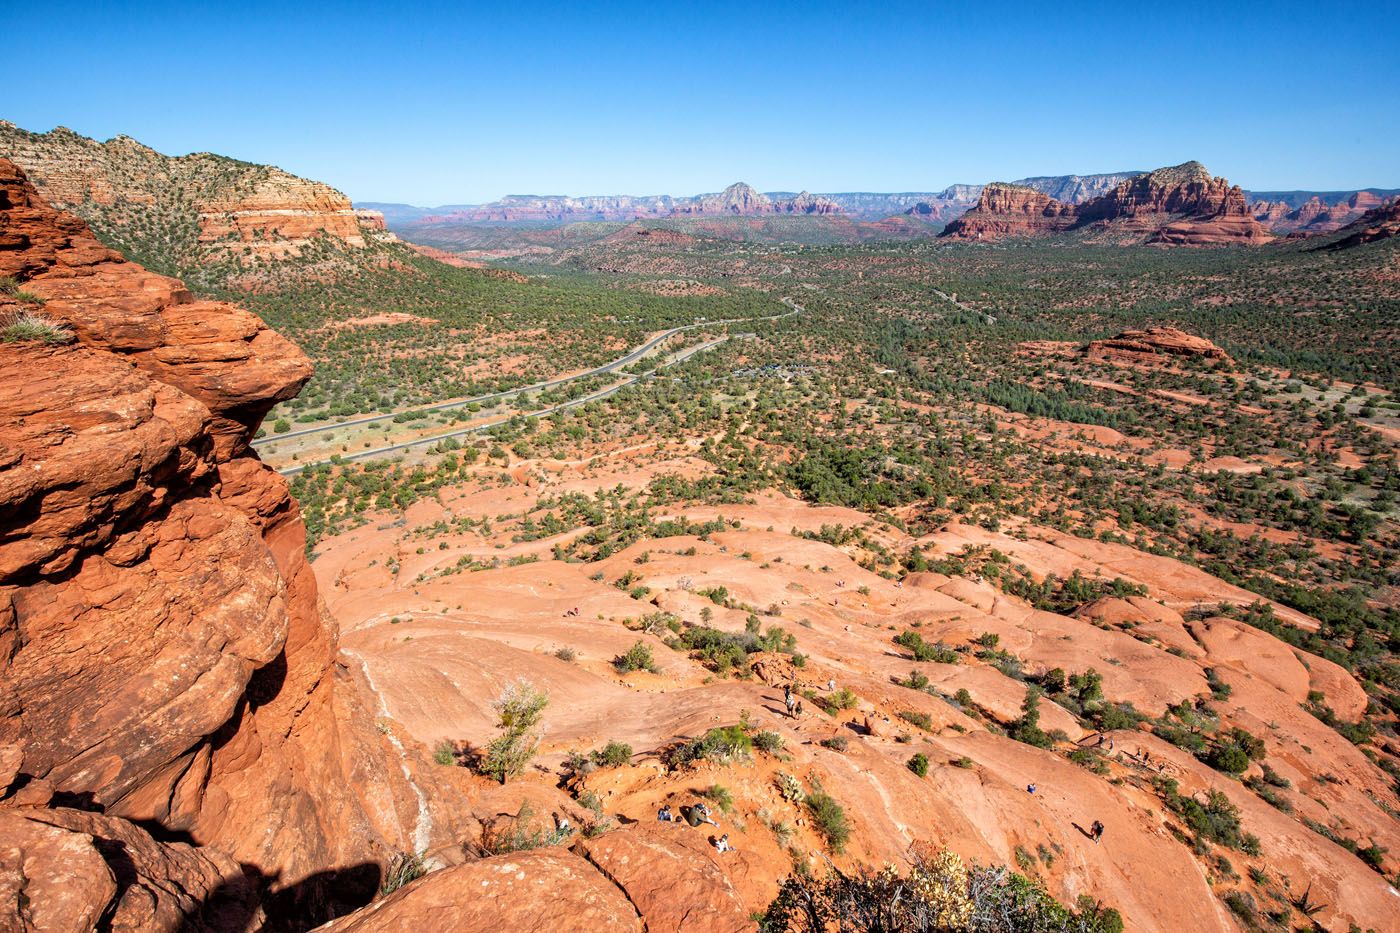
How far you wish to go is as much as you. You’ll be able to’t make it to the very prime of Bell Rock however you’ll be able to go fairly far. To get to the upper ranges, you’ll do some rock scrambling. For components of this climb, you’ll be mountaineering on sections of slickrock with a steep incline so it’s best to put on mountaineering footwear so that you’ve got good traction.
To complete the hike, retrace your steps down Bell Rock and again to your automobile.
Our Ideas on the Hike
Regardless of a packed parking zone, we noticed only a few folks on the loop path. Many individuals come right here simply to hike up Bell Rock. So, in case you are in search of a comparatively straightforward hike with good views and considerably low crowds, the Bell Rock and Courthouse Butte Loop Path is a superb choice in Sedona.
Climbing up Bell Rock is tons of enjoyable. If you’re visiting with youngsters, they may love this. The climb up Bell Rock is a pleasant heat up for Cathedral Rock, which is a really related expertise, simply on a grander scale (each by way of views and problem).
Nonetheless, in case you solely have time for one hike, we suggest the Cathedral Rock hike over Bell Rock.
For those who do that hike within the morning and wish lunch or brunch recommendations, it’s a quick drive to the Village of Oak Creek. Miley’s Café and Crimson Rock Café each get nice opinions. We had brunch at Crimson Rock Café. Their specialty is blue corn huevos rancheros and if you would like a deal with, order the large cinnamon roll…it’s 3 kilos of happiness!
Tricks to Have the Finest Expertise
Begin the hike early, ideally by 7 am. By beginning early, you will get one of many parking areas within the trailhead parking zone. Additionally, you will get forward of the crowds and hike within the cooler a part of the day.
Go away No Hint. Follow the seven ideas of Go away No Hint. This consists of packing out what you convey to the mountaineering path, be thoughtful of different hikers, and staying on the path.
Be taught extra about Sedona. Be taught extra about Sedona in our Sedona Journey Information, the place we checklist extra nice hikes to do, the place to remain and eat, and supply pattern itineraries in Sedona, whether or not you’ve simply someday, two days, or for much longer.
What to Convey on the Hike
Climbing footwear. You may get by with an excellent pair of strolling footwear or trainers for this hike. Nonetheless, in case you plan to hike up Bell Rock, I like to recommend sporting mountaineering footwear. The additional traction on mountaineering footwear will make your climb up the rock a lot simpler and safer.
Water and snacks. Convey at the least 1 liter of water in the summertime.
Sunscreen, hat, and sun shades. There’s little or no shade on this path.
Digicam. Even a smartphone will do.
If you’re new to mountaineering or are interested by what it’s best to convey on a hike, try our Climbing Gear Information. Discover out what we stock in our day packs and what we put on on the paths.
Extra Data on Sedona
BEST OF SEDONA: 15 Epic Issues to Do in Sedona
TRAVEL GUIDE: The Full Information to Sedona, Arizona
HIKES IN SEDONA: 12 Wonderful Hikes in Sedona
ONE DAY IN SEDONA: Find out how to Spend One Excellent Day in Sedona
SEDONA ITINERARY: Sedona Itinerary: Finest Option to Spend 1 to six Days in Sedona
DEVILS BRIDGE: The Full Information to Devils Bridge
BOYNTON CANYON: Find out how to Hike Boynton Canyon and the Subway Cave
SOLDIER PASS TRAIL: Full Information to the Soldier Go Path & Soldier Go Cave
CATHEDRAL ROCK: Find out how to Hike the Cathedral Rock Path
BIRTHING CAVE: The Full Information to the Birthing Cave Hike
BROKEN ARROW: Find out how to Drive the Damaged Arrow 4WD Path
4WD ROADS: Six 4WD Roads in Sedona…Which Ones are Price It?
PHOTOGRAPHY: Find out how to {Photograph} Cathedral Rock from the Crescent Moon Picnic Web site